A budget-friendly DIY & lifestyle blog

Tuesday, December 31, 2013

DIY // Budget-Friendly Industrial Wall Shelving

There's no better way to wrap up a whole year than with one final DIY project.  When we first walked through our house there were a few changes that we knew we'd be making; opening up the mudroom to the kitchen and adding bookshelves around the fireplace.  Two years later and we can proudly report that we've finally knocked both off our to-do list.


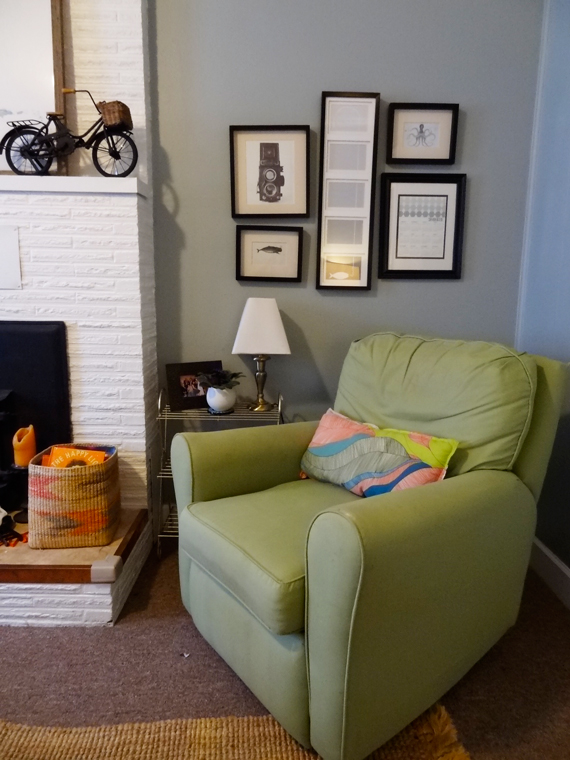
This update was budget-friendly and simple to build, plus it totally transformed our living room.  I picked up the supplies from Home Depot for less than $130 and broke out my trusty 3MDIY supplies to get started.
SHARE:

Friday, December 27, 2013

Baby & Toddler // Kids' Shared Room Reveal

Luke and Callaghan's room is well on its way to being a finished space.  The painted striped walls and painted chalkboard wall are still hanging tough but we made a few changes to make it more suitable for two kids.  The addition of the DIY loft bed allowed us to open up some flooring space.  If you remember from our children's shared bedroom inspiration post, we initially wanted to place the crib underneath but we just weren't comfortable with how tall the loft bed would have had to be.  So we scrapped that idea and decided a play & work area underneath would be better all around.


SHARE:

Monday, December 23, 2013

DIY // Loft Bed Book Storage

We're a family of book lovers.  Both sides of our family are readers which is one of the reasons why we fell in love - that and crosswords...and beer.  We have boxes and boxes of paperbacks and hardbacks upstairs that are just waiting to come out of hiding once we build a couple of built-in shelves for the living room.  It's not surprising, either, that our boys' room is overflowing with storybooks.

Reading is our one and only bedtime ritual that has stuck and now that Luke is getting older he's joining in on the action.  After we read to him he usually insists on reading to us.  He's got The Spooky Old Tree and SuperMan down pat and improvises pretty dang well on any other stories.  After storytime is over he usually crawls into bed and falls asleep "reading" to himself.


To keep his favorite books close I added a little bookshelf to the inside of his loft bed using a Bekvam spice rack from Ikea.  This spice rack is SUPER inexpensive (only $3) and is the same natural wood tone as the loft bed.

SHARE:

Wednesday, December 18, 2013

Handmade Holidays // Cornstarch Clay Ornaments

Is it any surprise that I love to throw in a handmade gift for the holidays?  A few years back I made Hot Pepper Jelly and it just wouldn't be Christmas without the Myers girls' annual Homemade Caramel making party.  I'm still making the caramels this year but I'm also adding a handmade ornament using cornstarch clay.


Salt dough tends to be the go-to medium for handmade clay/dough ornaments but a failed attempt last year when I tried making a couple thumbprint ornaments left me pretty unimpressed.  I wasn't a fan of how grainy the ornaments were from the salt granules so I thought I'd give cornstarch clay a try this year.

The recipe for cornstarch clay is slightly more involved than the salt dough but it requires a shorter drying time, is much more smooth and is a nice bright white when finished.

SHARE:

Tuesday, December 17, 2013

Small Space Solutions // A Makeshift Changing Table

Furniture that serves double-duty is key to getting the most out of a small space which is why there was no way I was going to purchase a changing table.  Most of the time we're changing Cal in the living room but there are times where a designated place for changing in the bedroom comes in pretty handy.


The old blue dresser was replaced with this 7-drawer dresser which not only holds both boys' clothes but also is the perfect platform for a makeshift changing table. 


Two inexpensive two-compartment wooden crates from Jo-Ann Fabrics and Craft Store keep all the necessities right at hand and the changing pad (with chevron cover) keep baby comfy and safe during diaper changes.  I purchased my pad new because I couldn't find a used one, but for those of you that don't live in the boonies finding a used changing pad should be no problem.  (They're gently used and have a plastic cover so you shouldn't have to worry about this used item for baby.)

SHARE:

Thursday, December 12, 2013

Apartment Therapy's Renovation Diary // Mudroom Renovation Lessons Learned

Phew!  Well that about sums it up.  Our Apartment Therapy Renovation Diary experience has come to a close but before we say so long we're sharing our lessons learned from our DIY mudroom renovation.

http://www.apartmenttherapy.com/meg-and-joshs-mudroom-reallife-lessons-from-a-reallife-renovation-renovation-diary-198038


Hop on over to Apartment Therapy and check it out - or take a look back at the whole process.


SHARE:

Wednesday, December 11, 2013

DIY Holiday Decor // Christmas Tree String Art

Just like every other holiday, I'm not a big decorator.  There's something about hauling all of the decorations out of their hiding places putting them out for a month and then having to put them all back that just turns me off.  I'm not a total Grinch - I do manage to garner up the motivation to decorate the mantle at Christmas.

This year I kept it pretty simple and traditional with my DIY West Elm Copycat Trees, a vintage window, Pottery Barn velvet stockings, lights and a cedar garland - and a new addition that I whipped up for Jo-Ann Fabrics & Craft Store's Celebrate the Season Campaign.  If this DIY Christmas Tree String Art isn't #fabulouslyfestive I don't know what is.


 To create your own, you'll need:
  • Embroidery Thread (DMC 25 Embroidery Thread #987 from Jo-Ann Fabrics)
  • Scrap Wood or Wood Plaque from Jo-Ann Fabrics
  • Nails/Hammer
  • Tree template
SHARE:

Monday, December 9, 2013

Kids' Shared Room // DIY Loft Bed

Things have been going pretty great since we brought home our newest little boy (knock on wood).  Big brother has taken to sharing his Mama & Daddy pretty dang well but sharing parents isn't the only thing Luke has had to get used to. Being tight on space, a shared kids' room was a given.  So Luke's toddler bed got the boot and was replaced by a new DIY loft bed and the crib.


We used plans from Ana-White.com and adjusted them slightly to better fit our room.  Rather than an angled set of stairs leading to the platform, we replaced it with a short vertical ladder.  We also increased the height of the bed to allow for another bunk in the lower section for when Callaghan outgrows his crib.  Plus, we added handles to the bed which made it easier for Luke to get up and down.

SHARE:

Thursday, December 5, 2013

Apartment Therapy's Renovation Diary // Mudroom Renovation Budget Breakdown

We're revisiting our budget over on Apartment Therapy's Renovation Diary today.  Initially we budgeted $3000 for our DIY Mudroom Renovation.  How do you think we did?  Hop on over to Apartment Therapy and find out for yourself!

http://www.apartmenttherapy.com/meg-and-joshs-mudroom-what-it-really-cost-a-budget-breakdown-renovation-diary-197873

Our Renovation Diary project is wrapping up - only one more post - and it sure does make me sad.  I've loved sharing our renovation with you via Apartment Therapy...perhaps they'd be interested in our attic renovation??  A girl can dream...


SHARE:

Wednesday, November 27, 2013

Apartment Therapy's Renovation Diary // The Mudroom Reveal

It's here!  The big reveal day and I am just so excited to share it all with you.  So, hop on over to our latest installment of our Renovation Diary on Apartment Therapy and check out the finished project for yourself, but watch out - you might have to pick your jaw off the floor!


To really feel the full affects of this DIY renovation, check out where we started - dark wood paneled walls, closed off spaces and no real style to speak of.  To say that I'm happy with the change is a definite understatement!


SHARE:

Tuesday, November 19, 2013

Apartment Therapy's Renovation Diary // It's A Wrap

We made it to the finish line and are sharing all the details at Apartment Therapy's Renovation Diary!  The mudroom renovation project is a wrap - check it out.

http://www.apartmenttherapy.com/meg-and-joshs-mudroom-its-a-wrap-renovation-diary-197364


Be sure to check back next week to see the big ol' reveal post!  I can't wait to share it with all of you.


SHARE:

Thursday, November 14, 2013

Thanksgiving Decor // Turkey Tablescapes

We're taking it easy over here for the holidays - something about a new baby and a busy three year old that leaves me little to no time or energy to really get down to crafting/decorating.  I did manage to find a short little break to create this festive thanksgiving tablesetting for Jo-Ann Fabric and Craft Store's Celebrate the Season campaign - a perfect setting for that turkey and all those delicious side dishes.


I kept it simple with a brown craft paper table "cloth" which is inexpensive, customizable and a breeze to clean up.  That homemade cranberry sauce sure is tough to get out of those linen tablecloths.  All I did was cut off two lengths from a roll of craft paper.  To get it to lay down along the sides, just run your finger along the edge of the table creating a sharp crease.  I also folded the corners so they'd drape nicely.


SHARE:

Tuesday, November 12, 2013

Apartment Therapy's Renovation Diary // Moving the Finish Line

Our initial plan in the whole mudroom renovation project was to finish everything by the time Josh packed up and flew to Alaska to bring home the bacon halibut but we didn't quite make it.  Check out why our progress was delayed in our latest installment in Apartment Therapy's Renovation Diary.


http://www.apartmenttherapy.com/meg-and-joshs-mudroom-renovation-diary-196898


Only one more progress post left and then we'll finally be able to share the finished space.  I can't wait!

SHARE:

Monday, November 11, 2013

Budget Friendly DIY Kitchen Renovation // The Big Reveal

If you're keeping up with our Renovation Diary feature on Apartment Therapy - you know the posts are pretty far behind our actual progress.   Real far behind, actually, because we're completely finished (shh...don't tell those AT readers!)  I mean...we're not crazy enough to start a remodel project when our baby is due....or are we?

While I can't show you photos of the new mudroom and kitchen nook space since we're just getting started on that project (wink, wink...nudge, nudge) I can show you photos of our kitchen which includes new flooring, crown molding and our new Moen Woodmere faucet.  And if you remember WAY back in early 2012 we tackled the bulk of the work in this room which included:

What didn't we change?  The layout and the counters were left alone (even that awful stainless trim) which helped keep the cost down.  The kitchen renovation was probably somewhere around $1200 including the Forna black beach cork flooring from iCork Floor, plus $800 for the stainless steel appliances we scored on craigslist.  Is there a better layout for this kitchen...hell yes!  But it would involve opening up the wall into the living room, relocating the oven and fridge and creating one big ol' open space....and lots more money.  And that just ain't happenin'.  So this little budget-friendly DIY kitchen renovation was a "work with what ya got" project rather than a full-on gut remodel.

And without further ado...


Let's just take a quick look back at what the kitchen looked like when we moved in...wallpapered walls and soffit, oak cabinets, maple-ish laminated floors, white appliances, vinyl backsplash and boob lights galore.  Not the worst kitchen I've ever seen but I knew it could be better.  At the very least we could fill that huge gap where the bottom cabinets end on the far right.


SHARE:

Thursday, November 7, 2013

Well, hello there...

Just wanted to drop in and share our news....our baby boy has arrived!  Callaghan Brent was born on October 25th and we are so excited!

Here's a little glimpse at our handsome little man.


As you can guess,  my two little men are going to be taking up a lot of my time and things are going to get a bit slower around here.  That's not to say I'll totally drop off the face of the blogosphere so stay tuned for more house projects and be sure to follow along at Apartment Therapy's Renovation Diary to watch our mudroom project unfold.


SHARE:

Tuesday, November 5, 2013

Apartment Therapy's Renovation Diary // The End Is In Sight

We're well on our way to a finished space.  Check out our latest installment in Apartment Therapy's Renovation Diary where we're throwing down flooring and throwing up drywall.

http://www.apartmenttherapy.com/meg-and-joshs-mudroom-renovation-diary-196901

I love how drywall transforms a room from scary, bare bones to something you can live in.


SHARE:

Friday, November 1, 2013

Nesting // Big Brother Bag

Baby #2 has arrived - October 25th to be exact!  And big brother Luke is so excited about his baby brother, Callaghan.  To make the transition from a family of three to a family of four easier on our 3 year old son we did what any amazing parents would do....bribed him with gifts.  I created a Big Brother Bag for Luke from his baby brother using the good ol' wear, read, want, need method.


1 // Tote Bag - This DIY monogrammed tote bag is the perfect size for Luke to take to school and he was pretty stoked that it was personalized with HIS letter "L."

2 // T-Shirt - There's something about these "Big/Little Brother" t shirts that make me all warm and fuzzy.
SHARE:

Wednesday, October 30, 2013

Apartment Therapy's Renovation Diary // Trial and Error

It's that time again - time for our latest Apartment Therapy Renovation Diary update.  This week we're wiring new lights and switches...and trying to pass an electrical inspection.  How many times do you think it'll take us to pass?


 Stay tuned next week where we tackle drywall - oh what a difference covered walls make!


SHARE:

Thursday, October 24, 2013

DIY // Faceted Table Lamp

What is a 9+ month pregnant lady who suffers from constant false labor pains to do to keep her from going crazy?  Fold a thousand little fortune tellers of course. 

This waiting around for baby to arrive is literally the worst part of pregnancy.  I've always had contractions and some days they're just little annoyances and other days they're pretty strong and regular and then all just up and disappear.  Most.Annoying.Thing.Ever.  To keep from obsessing over every little sign of labor I set out to give a basic table lamp a fun textural update - inspired by this faceted pendant light project.


You'll need to make a crap ton of fortune teller origamis for this project.  To start, you'll need square pieces of paper.  Save your pennies and forget about buying origami paper - you can make your own out of cheap copy paper.  I created (4) 4.25" squares from one sheet of paper.  The easiest way to make this size is to cut off 2.5" from the long end of a piece of basic 8.5x11" copy paper - leaving an 8.5" square.  Fold into fourths and cut - leaving four 4.25" squares. 

SHARE:

Wednesday, October 23, 2013

Apartment Therapy's Renovation Diary // Refueling the Fire

We're chugging along on this mudroom renovation.  Check out our latest installment on Apartment Therapy's Renovation Diary.


I love looking back at this renovation project - it's amazing how it all came together and how much family played a part in the whole process.


SHARE:

Tuesday, October 22, 2013

Curb Appeal // How to Paint Your Home's Exterior

You know that house - the one that's right in the middle of some big outdoor project but then is stuck in limbo for one reason or another and there it sits unfinished for months on end. We were that house.

At the end of June, I started painting the exterior - knocked out 5 of 7 walls with a roller and brush and had only two left.  Mind you, they were the two sides of the house that were tallest and required a much taller ladder than this pregnant lady was comfortable climbing. So, the last little bit was saved for the hubs who, unfortunately, hightailed it to Alaska before the job could be finished leaving it half painted for 4 months.


Don't worry - it wasn't left in this literal half-painted state. I did get the entire front finished (with help from my brother on the extra high parts.)

With the arrival of the baby right around the corner and the fact that fall is in full-force we knew we had to get this job finished. Fortunately we had all our go-to painting supplies on hand and even more fortunate - our neighbors had a paint sprayer leftover from their house painting project - so we were able to bust out the last two walls in no time.

SHARE:

Thursday, October 17, 2013

DIY Monogrammed Tote Bag

I love screenprinted tote bags, but I'm just too lazy to try out the whole DIY screenprinting thing, myself.  It seems so labor intensive and intimidating.  So, instead I created this easy handpainted version for my son Luke that's pretty much just as awesome.


You'll need:

1 // Tote bag
2 // Fabric Paint
3 // Small Paint Brush
4 // Circle template
5 // Pencil

SHARE:

Tuesday, October 15, 2013

Apartment Therapy's Renovation Diary // Bringing in the Professionals

Our next installment of Apartment Therapy's Renovation Diary is live.  Let me just say...it's pretty electrifying!


Oh, I just crack myself up.


SHARE:

Monday, October 14, 2013

Nesting // DIY Maternity Photo Shoot + Tips

Well, ladies and gents...I'm officially full-term - 37 weeks and 3 days to be exact.  That means any day now we could become a family of four.  Yikes!  I know everything will be fine and we'll adjust, but the thought of it sends me straight into a Nick Miller freakout.  Before we're swimming in a sea of diapers and sleep is just a sweet, sweet memory, I wanted to capture this exciting and slightly scary moment in time.

I'm all for professional family photos but it's just not in the budget, so I broke out the camera and set up my own little photo shoot to capture my last (mark my words!) pregnancy.  I don't have any fancy photography equipment - just a regular ol' point and shoot camera, a small tripod and some good ol' natural light.
Our bedroom is one of the best places to catch some good filtered light which is what you want rather than direct light which casts unsightly shadows.  I started out the photo shoot in front of one of the windows which is draped in sheer, white curtains from Ikea and is the perfect backdrop to get that gorgeous soft backlit effect.  I also placed a small bench in front of the window so I would be elevated and would have a comfortable place to sit for these first few poses.


SHARE:

Thursday, October 10, 2013

Spooky Spaces // A Halloween Mantle

I'm not one to go all out for the holidays and decorate every room in the house, but I do like to update the mantle from time to time.  Using a budget-friendly combination of crafty projects and home decor pieces I already own, Halloween is one of my favorite holidays to change things up.  So, when Jo-Ann Fabrics and Craft Stores contacted me to participate in their Celebrate the Season campaign, I jumped at the chance and created a spooky Halloween inspired mantle fit for any sinister character.


All it took to transform my everyday mantle into a spooky space was a quick trip to my local Jo-Ann Fabrics and Craft Store for supplies to create a simple craft and a couple additional Halloween decor items, plus a few more pieces I already had laying around the house.

The Holiday Decorations Spider Web Mantle Scarf, Martha Stewart Happy Halloween Banner, paper-mache witches hat and paper-mache tombstone were each on sale at Jo-Ann's and only ran me a total of $14.26.  Not too shabby!
SHARE:

Wednesday, October 9, 2013

Apartment Therapy's Renovation Diary // Demo Begins


It's hump day!  Get over that mid-week slump and pop on over to Apartment Therapy to catch our first Renovation Diary progress post  - we're diving in and tearing down walls.


So thankful for all the help we received on this project.  Definitely couldn't have done it without our family!


SHARE:

Tuesday, October 8, 2013

DIY: Replace Your Kitchen Faucet // Houzz

Can you say icing on the cake? (Mmm...cake.) Our basic kitchen faucet got the job done, but it wasn't grabbing anyone's attention, that's for sure!  With all the amazing changes we made to the kitchen and adjoining rooms it was leaving much to be desired.  So, when the amazing folks over at Moen contacted me about installing a new bathroom faucet from the 90 Degree line, which is gorgeous but a bit too modern for our traditional style bathroom, I shared our kitchen remodel and our need for an updated faucet and they were totally on board.  Little did I know I'd be getting the faucets of all faucets.

kitchenafter_16

Our new Moen Woodmere faucet is in a classic stainless finish and includes a pull-down spray nozzle which eliminated our need for our old spray nozzle.  It also is a single hole installation model so we were left with three additional holes after we removed our old faucet.  We'd love to add a soap dispenser and a water filter at some point but for now three stainless hole covers from Home Depot will do.

SHARE:

Monday, October 7, 2013

Change Is Good // A Living Room Update

I'm in deep, folks.  My nesting urges are taking over and my home isn't safe.  I went a little crazy the other day and rearranged our entire living room.  Sure, as a 9-month pregnant lady I shouldn't be moving around heavy pieces of furniture but good luck trying to talk me out of it.

Our living room has always felt overstuffed.  Our sofa is too large and the chaise just doesn't work with our layout.  As it initally sat, it was smack dab in the middle of the room's flow between the front door and the kitchen.  When we first moved in we tested it out in every section of the room and for some reason we settled on that location.  We've had to weave our way through furniture to move from one room to the next and our available floor space is pretty much nonexistent.  Throw toys into the mix and whoa nelly!  On the flip side, the tv console is much too small for our 46" tv.  It should be about 6-inches or so longer on each side and it's placement flanking the fireplace is all wrong.


It's a room where nothing works and we're just living with it.  Oh but we have plans...future plans.  I won't even begin to start talking about busting through the walls - that's a dream for another day.  But with the addition of built-ins flanking the fireplace, updated carpet like this Comfortably Classic carpet from Mohawk or this Martha Stewart Living Shaw carpet, windows above each built-in to bring in more natural light and a smaller sofa it will be a more functional and better designed space. But it's going to be awhile until any of those changes are made.  So we're stuck...at least with the main elements of the space.

SHARE:

Wednesday, October 2, 2013

Apartment Therapy's Renovation Diary // Mudroom Renovation - The Budget

Our latest installment on Apartment Therapy's Renovation Diary is being featured today.  We're sharing our (measly) project budget for our mudroom renovation.  Check out how we broke down the budget and plan to tackle this project for as little money as possible.


Stay tuned next week for our very first mudroom renovation progress post!


SHARE:

Tuesday, October 1, 2013

Baby on Board // How to Prepare for Baby...Or Not!

On Friday I'll be ringing in 36 weeks of pregnancy and it just dawned on me that this little baby could arrive anytime. And we are not ready! 

Scratch that.  We're slightly ready.  In an effort to clean up the upstairs and make it usable, the hubs installed the infant car seat in the car and the baby stuff was located and haphazardly piled in a corner to get to later....hopefully before the baby actually arrives.  Luckily we saved a good supply of clothes and swaddle blankets so the only necessities we're lacking is a place for the baby to sleep and some diapers.  Kind of left the important stuff, huh?

The one effort we have made to get ourselves ready for baby was probably the least important of all - in terms of necessities - but it is one of the most important for this Mama. 


momcorner

We replaced our little living room office area with "the best rocking chair in all the land" which we've been storing upstairs for the past 2 years.  Seriously, this chair blows your dad-chair out of the water.  It does it all - rocks, swivels and reclines.  Plus, it also has a matching rocking ottoman.  And my favorite of all....the head cushion is freaking comfortable.  Whoever built this chair found some way to capture a cloud and stuff it into a chair.  It's a miracle I don't fall asleep as soon as I plop down into it.  I spent many hours in this chair when Luke was a baby and I suspect I'll be spending just as much time with our new little one.  Although I guess I will have another kid that will require my attention...two kids?!  Is it strange that I still haven't fully comprehended what's in store?
SHARE:

Thursday, September 26, 2013

Houzz // DIY Painting Project: A Colorful Front Door


Do you feel that?  That bite of cold looming in the air?  Temperatures are dropping and days are growing shorter - summer is definitely over!  I'm currently at that mourning stage - wishing we had a few more weeks of warm weather but I'm also welcoming the change....and the weather ain't the only thing changing around these parts.


Continuing on our quest for a little curb appeal I gave our front door a little makeover.  Our white

I've been on the hunt for the perfect orangey-red hue and was leaning towards a salmony-coral color like Behr's Chili Pepper which would have been a bit more modern.  And then while on a mission at Home Depot I came across a gallon of Oops paint in a gorgeous red and was sold.
SHARE:

Wednesday, September 25, 2013

Apartment Therapy's Renovation Diary // Inspiration for Our Mudroom & Kitchen Nook

Last week Apartment Therapy shared our DIY renovation plan for our mudroom and kitchen nook.  If you missed it, we're opening up a couple walls and building a few built-ins.  It's going to be amazing.  Well, this week we're dropping some eye candy on you.


Check out our latest feature to see our inspiration for the space - but just try not to drool.  Our inspirations are full of pretty built-ins, lots of natural lighting and an overabundance of pillows!

Be sure to check out our post next week where we talk all things budget!


SHARE:

Friday, September 20, 2013

Apartment Therapy's Renovation Diary // Mudroom & Kitchen Nook Renovation

It's been a few months since I gushed on social media about an exciting new opportunity and then all was silent....I am so excited to FINALLY be able to share the news.  We're working with Apartment Therapy and contributing to their Renovation Diary feature - we'll be chronicling our DIY renovation from start to finish...all the good and the bad!

Check out our very first feature here and stay tuned for weekly updates!


So, think we'll come in on budget and on time?


SHARE:

Monday, September 16, 2013

Houzz // Get Those Carpet Stains Out: Best Nontoxic Methods for Cleaning Carpets


Carpets and rugs are comfortable underfoot but they're also magnets for stains.  From holiday gatherings to everyday use, carpets and rugs often take a lot of abuse.

But keeping your floor coverings looking their best is easier than you think.  A simple detergent solvent made with 1/4 cup vinegar, 1 teaspoon dish soap and warm water in a spray bottle can remove many household stains.


For a full rundown of common carpet stains and how to remove them check out my latest Houzz Ideabook, .


So, what methods do you use to battle carpet stains?


Disclaimer:  As a Contributor for Houzz, I have been compensated for any Ideabooks featured on Houzz, although I am not compensated for sharing Houzz Ideabooks on Revamp Homegoods.  All opinions expressed here are that of the writer and are in no way influenced by Houzz.

This post was sponsored by Moen.  All opinions are my own.
SHARE:

Monday, September 2, 2013

DIY Luggage Tags

It's summer (yes September is still summer!) and that means travel!  Whether you're a globe-trotter or a weekend-getaway type there's not a more perfect time to be out-and-about than now.  So pack your bags and get out and see the world but don't forget your luggage tag...and I'm not talking about that plain, boring one from the airline counter.


It seems that every good vacation has its moments of chaos and nothing is more stressful than losing your bags.  Luckily, a fresh update on an ordinary travel staple will save that favorite item of yours from being lost forever and look good in the process.  Here's a quick and simple way to make your own stylish luggage tags using stunning fabric and a little sewing - even a beginner can handle.
SHARE:

Friday, August 23, 2013

Curb Appeal // Frame Your Porch With Easy Care Perennial Beds

Summertime, and the living is...work!  Our front yard is slowly coming together.  It's the only side of the house that is completely painted.  Well, I guess that's not exactly true...we still have to finish the trim.  A least the deck is stained and the columns are finished.  That's something, right?

Well this pregnant lady wasn't quite ready to call it good just yet - aside from new paint and a stained porchbeefed up columns and some pretty little container gardens, what this side of the house - the first impression side - needed was some more life.  During the summer no one in our town waters their grass (our water bill would be outrageous!) so everything goes brown until the fall, winter and spring rains begin.  Just about this time I am itching to get some colorful plants into the ground - and this year was no exception.  I was fully prepared (and equally poor) after a trip to our local nursery, Brimm's Farm & Garden, Home Depot and Fred Meyer.


I dug up each side - keeping as much of our soil as possible.  Before I plant anything in the ground, I always test out placement - moving them here and there until I'm happy with the arrangement.  And I always have it in the back of my head that nothing is permanent.  As plants mature and grow to full-size, like the hydrangeas, many plants will need to be moved so I try to plant a full bed knowing that things will change in the future.
SHARE:

Wednesday, August 21, 2013

Curb Appeal // Hanging Baskets & Container Gardens

Nothing says, "Hey, I'm a cute little cottage" like a few plants, right?  That being the impression I want this house to give, I needed to get my ever-expanding butt in gear.  With some nice weather on the forecast (AKA not raining) I set out to put my greenthumb to the test by adding some container plants to the front porch.  Hanging baskets and container gardens are an inexpensive way to boost your home's curb appeal while adding a pop of color.  All it takes are a few containers, plants, soil and water - so simple, the hardest part is remembering to water.


I'm not too scientific when I choose plants for my containers - I do look for plants that will perform well in similar conditions, are hardy and look good together. But nothing is ever set in stone - with the changing of the seasons I'll take a second look and transplant anything that isn't quite working or didn't make it.

For both the hanging & pot containers, I typically like to combine different heights with an overflowing element.
SHARE:

Wednesday, August 14, 2013

Houzz // Baking Soda: The Amazing All-Natural Cleanser You Already Own


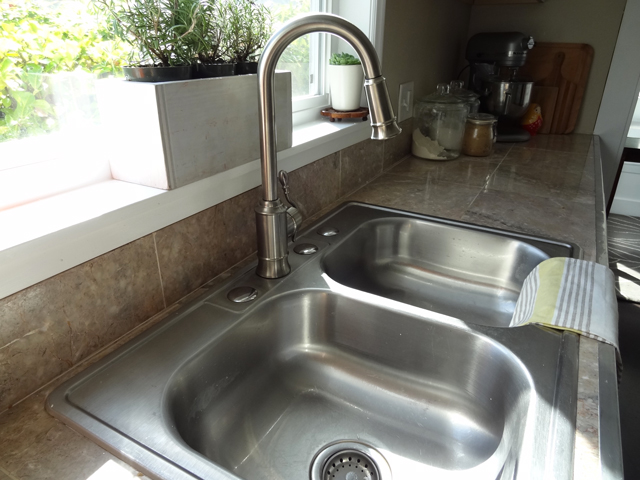
Fluffy pastries and scrumptious cookies might be the first things that come to mind when you think of baking soda, but this ingredient is far more than a baking staple. Baking soda, or sodium bicarbonate, is a powerful cleanser that should be a mainstay in your kitchen pantry and cleaning arsenal. This inexpensive, all-natural ingredient is neck and neck with vinegar as one of the most nontoxic and versatile household cleaning agents.  


Check out my latest Houzz Ideabook for lots of helpful advice on cleaning with baking soda and share your tips in the comments section.

My favorite?  
  •  Freshen babies' burp cloths and clothes by sprinkling on baking soda, rubbing it in and washing as usual.
It is SOOO hard to get that nasty spit-up/vomit smell out with just laundry detergent - I'm so glad baking soda can tackle this tough job.


post signature


Disclaimer:  As a Contributor for Houzz, I have been compensated for any Ideabooks featured on Houzz, although I am not compensated for sharing Houzz Ideabooks on Revamp Homegoods.  All opinions expressed here are that of the writer and are in no way influenced by Houzz.

This post was sponsored by Moen.  All opinions are my own.
SHARE:

Monday, August 12, 2013

Kid n' Play // DIY Lego Puzzle Book {Downloadable}

Let's be honest - working on DIY projects with kids around is nearly impossible.  They either want to "help" or they have other plans for how they want you to spend your afternoon.  For those times when I need to get something done busy projects are a life saver and they sure beat sticking an iPhone in my little one's hands.

Legos have been around for decades and are a favorite among both kids and parents.  A Lego Puzzle Book, which I first spied over at KidsActivitiesBlog, is a perfect project to engage kids in an activity that they highly enjoy which means plenty of uninterrupted project time for Mama, too.  It may require a little help at first but once they get the hang of it it's a perfect independent play project that develops important math and problem solving skills.


A few months back I laid out a few of Luke's Lego creations on white copy paper and snapped a few photos.  I finally got around to creating the puzzle book which was as simple as printing off the photos onto cardstock and stapling the book together.
SHARE:

Tuesday, August 6, 2013

Baby on Board // Baby #2 Wish List

We always planned to have another baby.  (Actually, we planned to have four...and then after we had Luke I quickly widdled that number down to two.)  Since we planned to add one more little tike to our crew I kept nearly everything which might have something to do with why our attic is overflowing.  Luckily, we're having another boy so I don't really need much but there are a few things that I'm dying to have this go-around.


SHARE:

Monday, August 5, 2013

A Girl Can Dream // Attic Inspiration

If you caught the post about our attic then you know how far we have to go before it is a liveable space.  And while I'm putting off clearing out the space I'm in my happy place dreaming of all it could be.  Here are a few of my favorite inspiration photos - full of built-ins, exposed beams, and lots of light - all things we are currently lacking.

Landing/Sitting Area:


SHARE:

Thursday, August 1, 2013

So....Who Wants To Clean My Attic?!

Did it help that I said that in a "Who Wants To Be A Millionaire" game show host voice?  No?  Too bad because what's behind door number 2 is a dream!


A hoarder's or professional organizer's dream, that is!  The mess starts at the stairs where things have just been dropped because we're just too lazy to carry them upstairs.


And upstairs?  Holy mess-of-all-time!  Our upstairs needs work.  Lots of work.  Oh how I wish I could go back in time and set it up from the beginning rather than making it our storage/dumping ground for all the things we don't have room for.  I also wish the hubs was home so I could put him to work removing everything!
SHARE:

Wednesday, July 31, 2013

Houzz // Vinegar and Voilà: Clean Your House the Natural Way


Many homeowners strive for a healthier home — whether that means choosing ecofriendly materials for a remodel or greener products for everyday life. For me, finding healthier, more effective and budget-friendly cleaning alternatives is at the top of my list. Fortunately, effective nontoxic options have been around for centuries. Many of these cleaners, including vinegar, are already in your closet.


Vinegar is one of the most versatile and effective household cleaners. At pennies per ounce, it's also one of the most inexpensive cleaners on the market. Simply mix 1 cup of water and ¼ cup distilled white vinegar in a spray bottle. This basic mixture can be used for most cleaning chores, with additional natural elements added to tackle tougher jobs. 

Check out my latest Houzz ideabook for a full rundown of ways to use vinegar in every room of your home and feel free to share your tips in the comments section.


Disclaimer:  As a Contributor for Houzz, I have been compensated for any Ideabooks featured on Houzz, although I am not compensated for sharing Houzz Ideabooks on Revamp Homegoods.  All opinions expressed here are that of the writer and are in no way influenced by Houzz.


SHARE:
© Revamp Homegoods. All rights reserved.
Blogger templates by pipdig
09 10 Code line 7 9 is for loading jQuery library. Remove this line if you’ve already loaded it somewhere else in your blog. Hint: If your blog has an image slider, carousel or something with fading effect running, chances are it is powered by jQuery. If this widget doesn’t work, the first thing you want to do is comment out or remove this line. To use your own button, replace the URL in line 3 with the direct link URL to the image. Make sure to keep the quotes. To reposition the button, replace