Salt dough tends to be the go-to medium for handmade clay/dough ornaments but a failed attempt last year when I tried making a couple thumbprint ornaments left me pretty unimpressed. I wasn't a fan of how grainy the ornaments were from the salt granules so I thought I'd give cornstarch clay a try this year.
The recipe for cornstarch clay is slightly more involved than the salt dough but it requires a shorter drying time, is much more smooth and is a nice bright white when finished.
Cornstarch Clay
Prep time will take about 20 minutes, baking time at 175° F oven is estimated to take 2 hours.
- 2 cups of baking soda
- 1 cup of cornstarch
- 1 cup of water
Combine all ingredients in a medium pot and set on stove at medium heat, stir until all ingredients have dissolved.
Continue stirring until mixture begins to thicken. Once mixture thickens transfer to a large bowl. Cover with a damp tea towel/cloth until the clay has cooled sufficiently to work with.
Begin kneading dough until it reaches a nice smooth, soft texture. If you find that the mixture is a bit dry add a few drops of water {careful not to add too much}, re-knead until smooth.
Roll your dough out to approx. 1/4″, slightly thinner would be fine.
Cut into your desired shapes and add texture/ink. Add your holes at this point with toothpicks, straws or chopsticks.
Transfer your finished creations to a baking sheet lined with parchment paper and pop them in a pre-heated oven. Bake at 175° degrees F for about 75 minutes , then flip and continue for about another 45 minutes.
Remove from oven. Let cool, then gently file down any rough edges.
Leave as is or finish with paint/varnish.


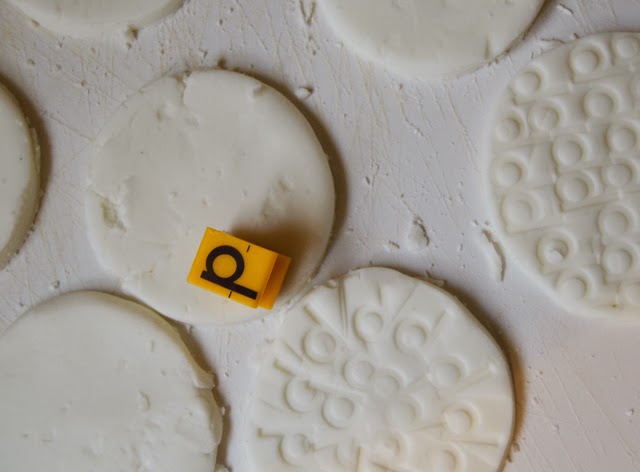
This is an all-around great handmade gift that the kids can get involved with. Luke had fun rolling out the dough and painting the ornaments. Then we stamped a few with a letter P for Padgett and also made a few with our thumbprints. I intended to leave everything white but we were having a tough time seeing the thumbprints so we gave them a few coats of gold craft paint and that did the trick.
So what handmade gifts do you like to give?
No comments
Post a Comment
Thanks so much for taking the time to leave a comment!
If you enjoyed this post, feel free to hang out awhile and catch up on all of our DIY projects - or better yet, Subscribe and get future articles delivered right to you. Cheers!