
Since I moved the large map from the large wall to the mantle (which seems to work better) the wall is back to being a large blank wall. I didn't tackle that bare space, but I did work on the wall to the right of the fireplace.
I created this "Only Fish In The Sea" art and hung it there, but wasn't really feeling the look of the one narrow frame hanging in the center of the wall and as I mentioned, I wasn't very happy with the art behind the sofa. So, I grabbed a couple of the pieces and started hanging them around the fish art. The vintage camera print is a free printable which you can download here. I sized the image down to an 8x10.

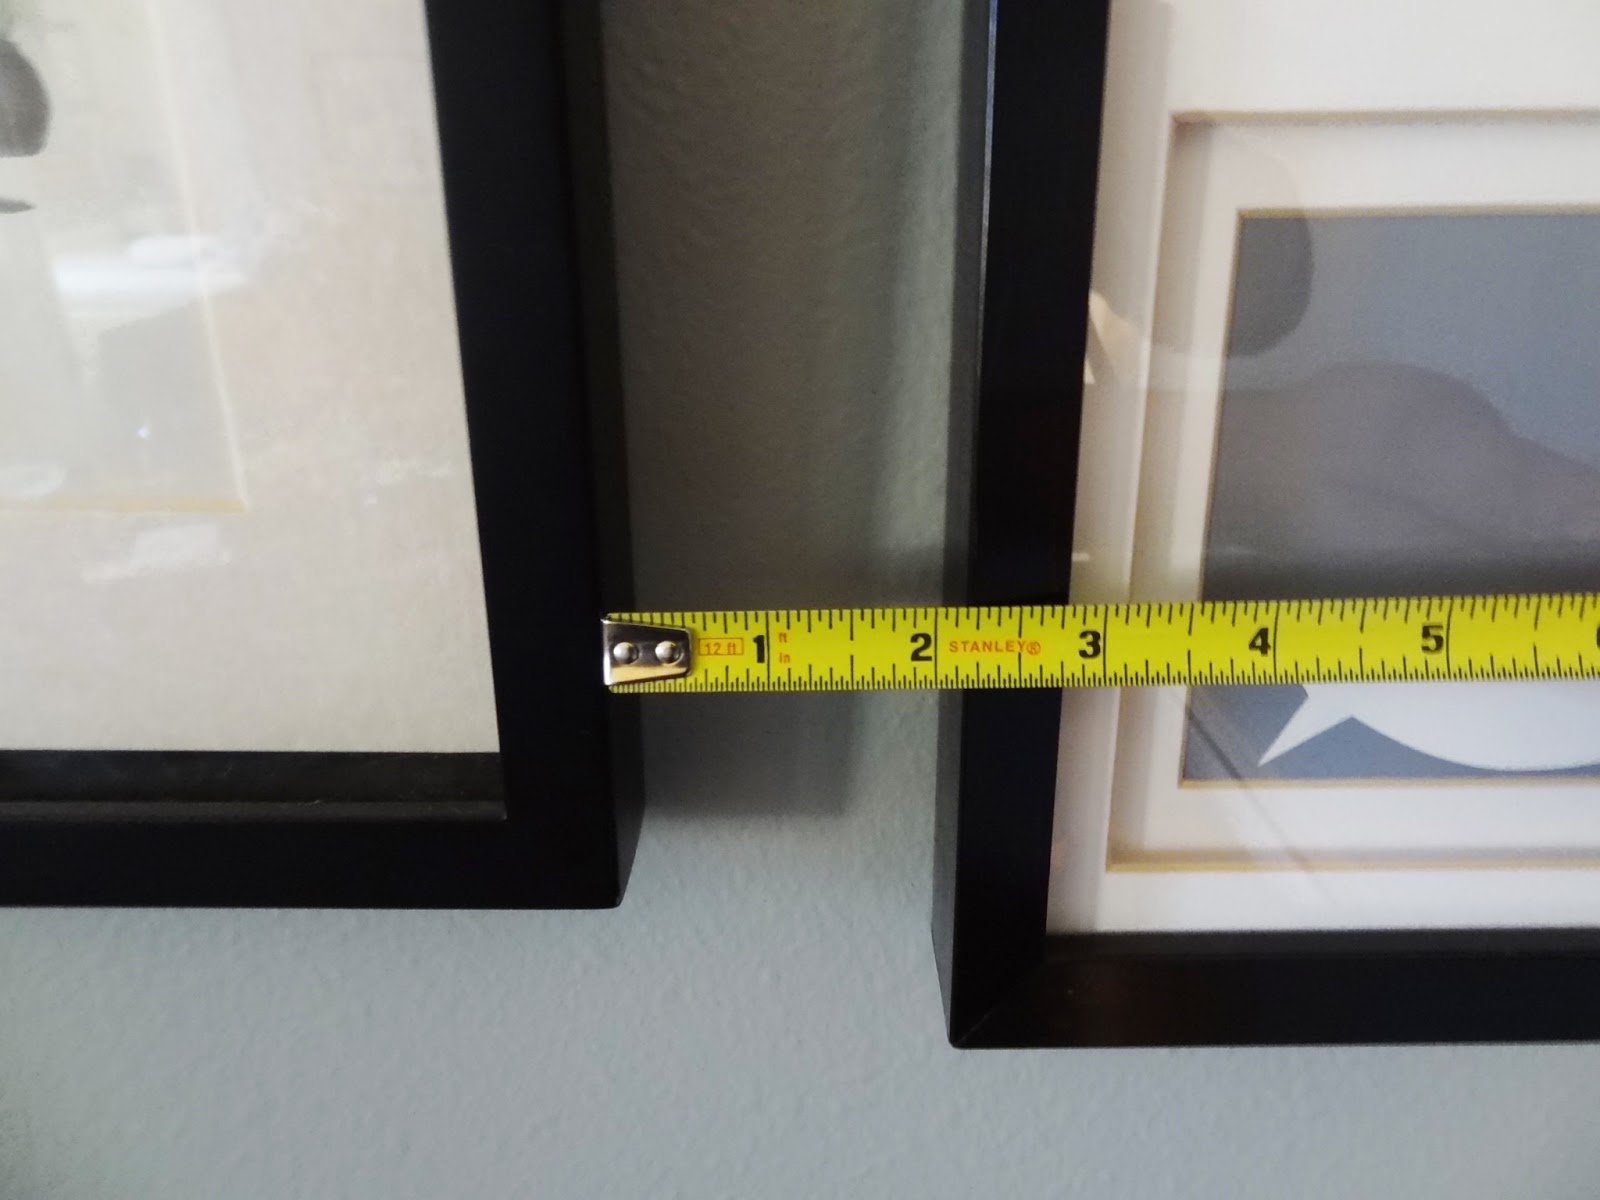
A little tip on hanging groupings of frames - Hang your center frames first - whether its a single frame or multiple. Then pick one side and hang those frames. For the first side, I eyeball spacing to what I think looks best. After the frames are hung on the first side, measure the spacing between each frame and mirror it on the other side of the center frame. A good rule of thumb is 2 to 2 1/2 inches between the frames. Also, you want center the art around eye level (generally 53 inches from the floor.) I didn't have the same size frames so it wasn't an exact mirror but the equal spacing keeps things cohesive and pleasing to the eye.

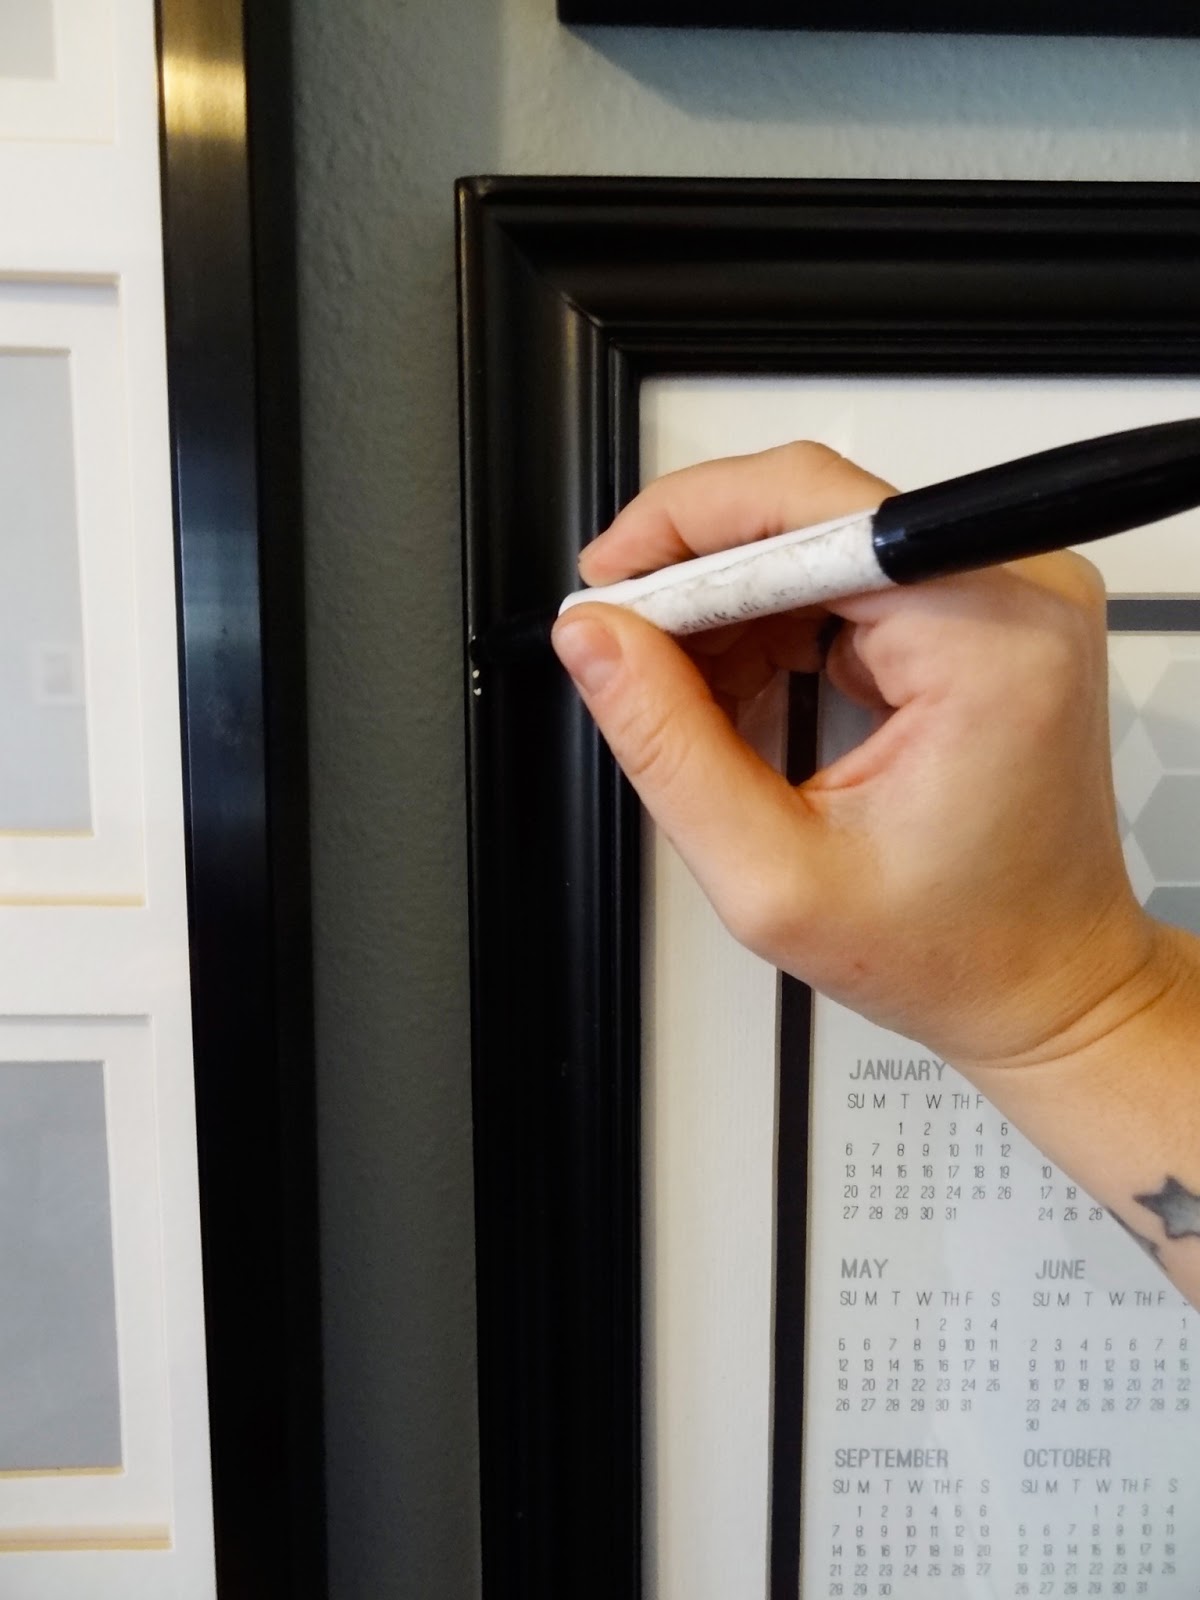
Another quick & easy tip: if you ever find little chips in your black frames, rather than breaking out the paint...use a sharpie! A paint pen would also be just as convenient.
Did you catch a glimpse of that corner bookshelf? We've had that since we lived in Seattle and it totally worked in our condo, but I can't say the same for it in this house. It's like the black sheep of the room - it gets little attention and I'd rather not have it around. This whole organization kick has me purging things that I don't use, need or things that just aren't quite working anymore and replacing them with things that we do need.
What we don't need is a corner bookshelf that only has three items on it's five shelves. What we do need is a home office where I can write without feeling like a couch potato and where Josh can do his grad school homework without taking over the dining table. Without the luxury of an extra room to designate as our office - we have to be smart about how we use our limited space. The smartest thing we could do is make this little corner of the living room our mini office. Not only is this a small space solution, but it's also a "work with what you got" moment.
I hauled the bookshelf upstairs and brought our amazing little desk downstairs. I always feel like a super woman when I'm able to carry a piece of furniture myself. It's probably not the best idea for my back, but oh well.
Like a true traditionalist, I was trying to find every way to keep the second orange chair in the living room, but it was feeling way too cramped - especially since we'd be needing a desk chair.

I even tried it on the other side of the room, but that was just ridiculous. (Don't mind the cord - we were streaming some movies.)

So, I exchanged it with the chair I reupholstered from our bedroom and by golly I love it.

The black and white fabric ties in the black frames and white mats like it was planned that way.


The big wall still needs something...bookshelves? Nothing???

The wall behind the couch was looking pretty sparse after I stole four of its frames. I couldn't just let these guys hang out on the big ol' wall - especially that map which went back upstairs with the corner bookshelf. The frame with the family photos got a new home in our bedroom. And all of a sudden...

We had a second large blank wall.

This room sure has gone through a transformation these past couple of weeks. It went from this...

To this...


With this final update, the living room organization project is finished! I know, I know. I still have to figure out some art for the wall behind the sofa and something for the large wall with the baseboard heater, plus I need to do some deep-cleaning of the carpet, rug and sofa. But, I still consider it finished.
Now on to the next room. I just can't decide if it should be the kitchen or our bedroom - they're both disasters. Any suggestions?
So what about you guys? Have any small-space solutions of your own?
Love the new little desk area. Time to write some letters here or re-write some recipe cards..it's the perfect place!!
ReplyDeleteThanks, Bronwyn! This little desk has already gotten tons of use - and is the perfect place to finally finish those xmas thank you cards!
DeleteYour living room looks so much more open and roomier. I also love the desk area. That chair is great! Looks awesome!!
ReplyDeleteIt's crazy - it feels SO much bigger in here!
DeleteI liked the longer length of the old curtains much better.
ReplyDeleteThanks for visiting! Yeah, I know that these are rocking the high-water style and that's not for everyone. But I'd rather have a set of curtains than a pile of threads. For some reason our cat won't mess with them at this length, but when they are to the floor they get destroyed.
Delete