
I grabbed the piece from our local thrift shop for $3.99. The floral needlepoint top was a little too traditional and dated for our home, but I knew with a little cleanup and update it could be a cool addition to our living room decor.

While the needlepoint cushion isn't my style, I absolutely love the carved silhouette of the legs.

Like I said, transforming this ottoman was easy. First I flipped the ottoman upside down and detached the cushion from the base.


Once I had the cushion and base separated, I began cleaning up and fixing the base. The decades of dust and dirt came off easily with a quick wash of soap and water. Plus, the only repair that was needed was tightening up a screw on one wobbly leg.

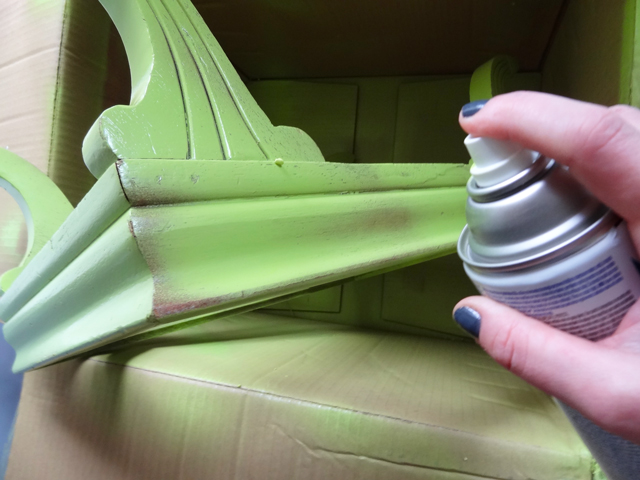
After the base was dry and all screws were tightened, I sprayed it with three coats of Rustoleum's Ultra Cover Gloss spray paint in Key Lime.
Between coats of paint, I started work on the upholstered cushion. I used pliers to remove all of the original staples (needle-nose are easiest, but anything you have handy should work.)

With the needlepoint cover removed, I inspected the base layer and the foam cushion.


Normally, I'd continue removing layers and replacing them with fresh foam and so on, but since everything was in pretty good shape I left it alone and moved on to recovering the cushion. I used some of of my Covington Wilmington Multi fabric that I scored from Online Fabric Store, which was leftover from my sag-top drapes project and my easy sew pillow cover project. This fabric has a vibrant multi-colored paisley pattern and goes perfectly with the key lime color.
Whenever I'm recovering a piece of furniture or a cushion, I lay out the fabric and get a good look at what I have to work with. Since I painted the base in a bright chartreuse I wanted to highlight that same color in the fabric pattern. I found the best section with pops of bright chartreuse and used the cushion as a template to cut the cover piece - making sure to cut 1 1/2 to 2 inches larger on all sides.
Once the fabric piece was cut to size, I laid the fabric on a table face down and centered the cushion face down on top of the fabric.

To attach the fabric to the cushion, I tightly pulled the sides over and stapled three times into the underside of the cushion (once at the top, once in the middle and once at the bottom). Then I moved over to the opposite side and repeated the process. Once the two sides were secured I went back around to add more staples to give it a bit more strength - stopping about an inch from each corner.

For the ends, I pulled the fabric up, tucked it into the corner and put a few staples into the side.


The corners are easier than they seem. With the side tucked into the corner, I fold it over on top of itself to create a nice, smooth triangle shaped flap and staple it into place. Repeat on the opposite end.


With the cushion updated, reattach it to the base.

I love how the base really makes the colors in the fabric pop against the white background of the fabric.


These quick and easy transformations are always my favorite and I can't help looking back and forth from the Before and After photos.
What about you guys? Have any upholstering tips you'd like to share? Is there a piece of furniture that you've redone and are proud of?
I really like what you've done. I'm pinning for future reference, since I'm currently on the hunt for an ottoman. :)
ReplyDeleteThanks, Janelle! Good luck on your ottoman hunt!
DeleteLooks great! The limey green makes it so cheery!
ReplyDeleteI gotta saythough, I am really crushing on that print of the throw pillow on your awesome orange chair! Was that a fabric you found?
Oh this pillow...It's a cool raised embroidered print and I love it! I found it at goodwill but it's from target's RE brand. I just can't seem to find another one!
DeleteI love the green! Everything looks amazing.
ReplyDeleteThanks, Mary!
DeleteI need help redoing my dining room chairs! Great job!
ReplyDeleteI love it! I'm a huge fan of lime green. You make it look so simple! I'm going to have to keep my eye open on thrift stores for an easy project I can tackle.
ReplyDelete