
I packed this sad looking oak cabinet home from my friend's mom's house and was welcomed with laughter and exclamations of doubt. I don't know how many times I've heard it referred to as firewood from my husband, brother and dad. Oh ye of little faith. It's honestly hard to blame them for their lack of vision. This cabinet was in ROUGH shape.

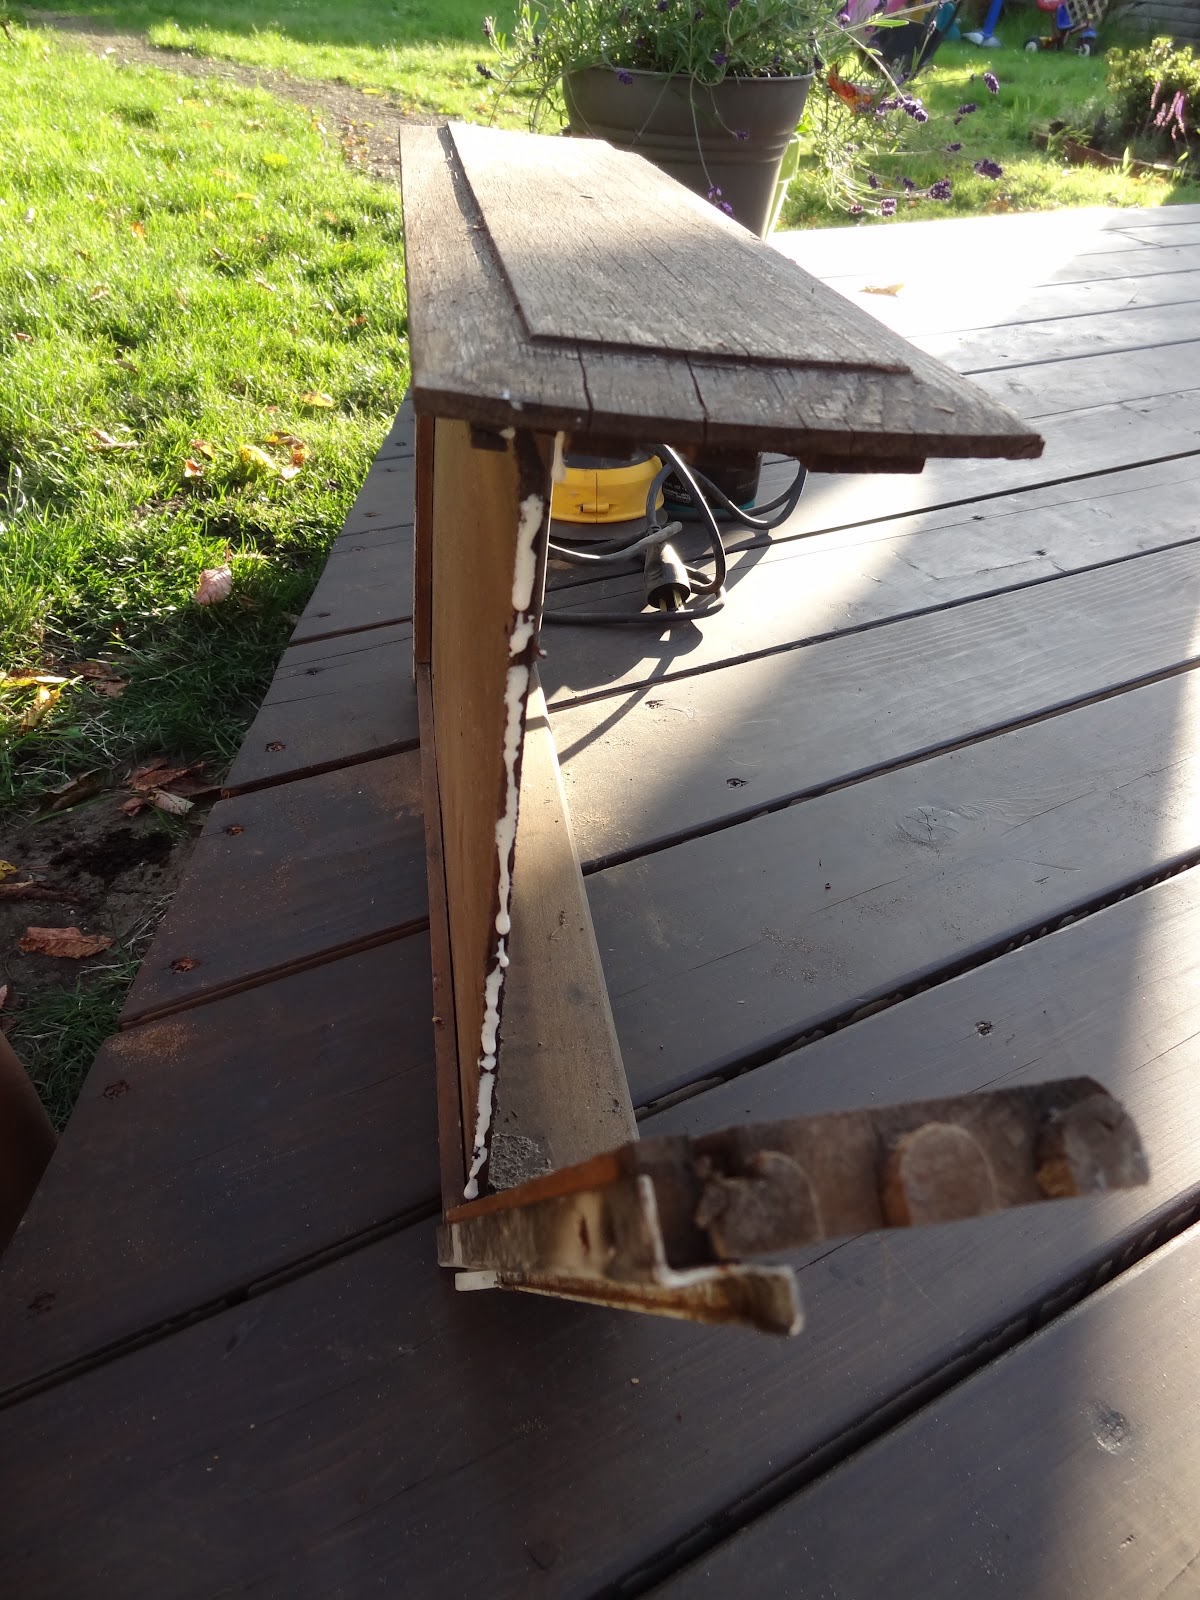
It was dirty and cobwebby. The drawers were missing their fronts and were no longer square. There were unattached boards throughout. The top had what resembled burn marks (or severe water damage) and huge gaps in between the boards. The back was bowed and unattached in some places.

But, I just knew better. With a little cleaning and fixin' this bad little boy could be a showstopper. I had high hopes of converting it into additional bathroom storage for the hallway, but it was just too long and with nowhere else in the house for it to go (for now) I thought it could be a great outdoor storage piece.
I started by sweeping and vacuuming all the dirt and webs. Then I removed the back so that I could reattach the side and top boards. Since this cabinet was going to be sitting outdoors, I used rust-proof deck screws to reattach all the pieces.


I reattached the drawer fronts and sides with Gorilla wood glue.

I let them dry and scraped off all the dry and brittle laminate.


Then I sanded everything down until it was nice and smooth and gave it a good wipe down with a towel and water.


I filled the large gaps with paintable caulk.

The next day I gave it another sanding to remove any excess caulk and smooth it down a bit more.

It was looking a whole lot better.

After some more sanding and a good cleaning, I gave it a coat of primer.

And then it dawned on me that I didn't fill the gaps on the top. So, I busted out the wood filler and got to filling. I let it dry and gave the top another coat of primer.

The dresser got three coats of Behr's Desert Glow semi-gloss exterior paint. The color was a little too saturated for what I wanted so I cut it with a creamy yellow high-gloss paint I had on hand, which brought it down to the perfect shade of bright yellow.


I primed and painted the back with a coat of satin white exterior paint. Then I printed a chevron template and started tracing and painting the design with a sponge brush and some tester paint I picked up at home depot. (And apparently I had a healthy helping of tator tots during the process.)

With the back piece complete, I reattached it and bam! I'm pretty sure all those naysayers felt the tides turn as the final nail was driven in.


It's the perfect little storage piece for outdoor candles, alfresco eating wares and outdoor toys & games. I just love it! And the fact that it was a piece that most would have sent to the fire pit or the landfill makes me head over heels.
Let's just take a look at the side by side before & after photos. Amazing, right?

So what about you? Have any trash to treasure transformations you'd like to
It looks amazing! Great job!
ReplyDeleteAnd she's done it again! Who's laughing now, boys! Great job, Gert!
ReplyDeleteThis is adorable! What a perfect transformation! ;)
ReplyDeleteWow! This is an extremely impressive re-do. Great job. Makes me want to go out garage saling.
ReplyDeleteLOVE IT! And love redo's. Glad I found your blog at Trendy Treehouse! Hope you can follow me too so we can share redo inspirations! ;)Alyssa of Boston
ReplyDeleteWow this turned out awesome! Love the yellow! We picked up a similar trash piece that will soon be treasure too! It takes a little work but it's amazing when you're done! Fab job! We'd love it if you'd share this at our Home is Where the Heart is! http://www.homesteadsimple.com/home-is-where-the-heart-is-link-it-up-wednesdays-1/
ReplyDeleteand any other posts you'd like to share that have to do with homesteading and homemaking!
Wow! That's awesome...love it! Great "trash to treasure" makeover!
ReplyDeleteThis might be the best 'before and after' ever! I LOVE your blog and have been stalking past posts for the last 25min at work! ha I am so glad I found it and I am your newest follower! If you have time I would love for you to check out mine!
ReplyDelete-Peggy
Wow! Talk about a transformation! IT has my two favorite things right now yellow, and chevron, love it!
ReplyDeleteholy geez! that is wonderful!!
ReplyDeleteWow! This looks amazing! What a fun project!
ReplyDeleteLove it! Thanks for the inspiration to get creative with some stuff I have.
ReplyDeleteThis is so cute! I love the idea! I would love for you to share this at my link party http://thewinthropchronicles.blogspot.com/2012/07/share-it-link-party-21-giveaway.html
ReplyDelete(you can also enter to win a $50 gift card to Amazon just by linking up. It closes today)
I love it! You did a wonderful job of saving that piece. I always love to see someone do that. Thanks for sharing.
ReplyDeleteYou did such an awesome job on this cabinet! I'd love for you to share it at my Marvelous Mondays party. http://www.jamscorner.com/2012/07/marvelous-mondays-link-party-5.html
ReplyDeleteI am your newest GFC follower. I'd love for you to check out my blog and follow back. :)
Julie
www.jamscorner.com
Seriously cute! You did a great job. Thank you for sharing. Visiting from Sunday's Best. Would love it if you would share this at my Make it Pretty Monday party at The Dedicated House. http://thededicatedhouse.blogspot.com/2012/07/make-it-pretty-monday-week-8.html Hope to see you at the bash. Toodles, Kathryn @TheDedicatedHouse
ReplyDeleteThis is definitely an "I told you so!" It's hard to believe that this is the same piece! Great job!
ReplyDeleteIt is a perfect example of an I told you so! I would just keep saying it over and over again, proudly. But she is so cute to be outside. Love that you HAND painted the chevron! Really turned out quite beautiful, and I love it. Do you have a Facebook page, that's how I follow and would love to follow you. I'm not on GFC cause I am self hosted wordpress. So glad you shared your creative inspiration with Sunday’s Best – your creativity helped make the party a success!
ReplyDeleteHi Cathy! Thanks so much and thanks for hosting the party! I do have a facebook - https://www.facebook.com/RevampHomegoods
DeleteThanks so much everyone! It definitely still has me dusting my shoulder off.
ReplyDeleteGees, you really put some love into this piece. Nicely done!
ReplyDeleteI can't believe that's the same piece! It looks great! The colors, the pattern, everything! Thank you so much for sharing at my Throwback Thursday link party. I hope to see you again this week :)
ReplyDeleteJust stopping by to thank you for sharing this on Marvelous Mondays! I hope to see you again next week. :)
ReplyDeleteJulie
What an amazing transformation! I found your blog through Marvelous Mondays and love it!!!
ReplyDeleteLooking forward to seeing more of your transformations! I have just followed your blog!
Come by and say hi sometime =)
www.musthavewear.blogspot.com
So cute! I love it! You did a great job!!
ReplyDeleteThat is just gorgeous! I found your amazing piece on Roadkill Rescue! :) Megan
ReplyDeleteRoadkill Rescues sent me. This is AMAZING, STUNNING & INCREDIBLE! I would have passed it up for sure. Love the yellow with the grays. You have a "good eye" (a good pair apparently).
ReplyDelete