My plan was to paint all of the living spaces (i.e. the living room, hallway, stairway, landing, etc.) a light warm gray covering up the off-white that is painted everywhere including the trim and ceiling. I swear they just moved through the whole house with a paint sprayer and no surface was safe! (Sounds familiar, Pops?) Yes, gray. Just like everyone else.

I like gray. No, I love gray. If you're a Pinterest follower then I'm sure you're well aware of my love of gray. It's a perfect neutral and is both modern and traditional. It's perfect for our young little family and our little coastal cottage. BUT, my warm gray color would be a new purchase. One that I don't really think I could rationalize to my hubby which means that I'd have to live with these hideous off-white walls for whoever knows how long.
So I have. And I've made do. I contemplated painting it the same as the kitchen which is a nice beige. I painted the walls flanking the fireplace to test the color and it did look better but I knew I would want to change it later on so I decided against it and just lived with the off-white and partially painted beige walls.

A few days ago that itch was a little too strong and with some "use what you got" mojo these off-white walls got the boot. We've had a 5-gallon bucket of high-quality paint that we scored for $30 just waiting to be used but I was just not feeling the color, a burnt-orange beige. I busted out that bucket and a few of our other leftover paint cans and decided to make my own shade.
I wanted to stay in the grayish range but also wanted a bit more color inside so I was flexible in the end result. Anything would be better than what I had going on. I grabbed my paint mixer drill attachment, added (little by little) some leftover blue from Luke's dresser transformation and black to the beige and mixed until everything was fully blended.
After the third mixing, I created the perfect color. I finished painting both the living room and the hallway, cleaned up and put everything back in place before my husband got home. He walked in and loved it.

I did too. Until I looked at it for awhile. The color definitely had a gray side to it that I was fond of, but it was also pretty green. It is a great color. We even used something almost identical in our Seattle condo, but it's far more forest cottage than coastal cottage.

I sighed, warned Josh about the impending chaos and pulled all the paint supplies back out to repaint both rooms. I began by adjusting the color with more blue (this time a dark midnight navy) until I had a color that I was happy with.

But, I couldn't stop at just one color - I loved the dark steely blue and knew it would look gorgeous in the hallway but I wanted a lighter version for the living room. I mixed the dark blue into the off-white (the previous owners left us two 5 gallon buckets of it) and a few touches of brown to create a beautiful light blue-gray shade.
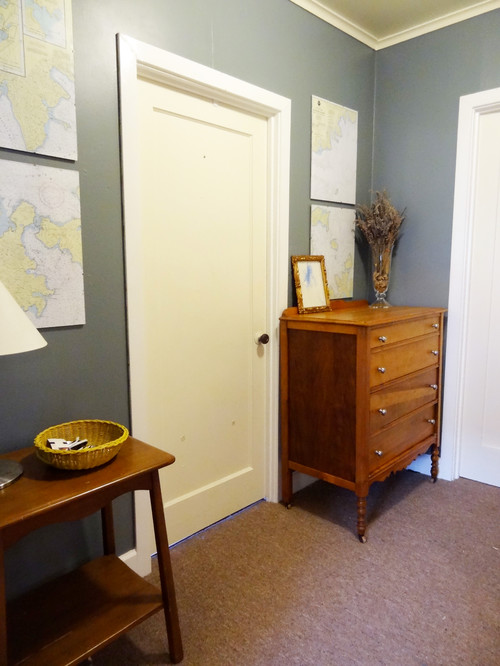
Once again, I started painting and before I knew it I was finished with both rooms. And once again, everything was back in order before Josh got home. He walked in, loved it and this time, I did too. The dark smoky blue looks perfect in our hallway. It accents the bright white trim and allows the muted nautical charts, which got a new home, to stand out.

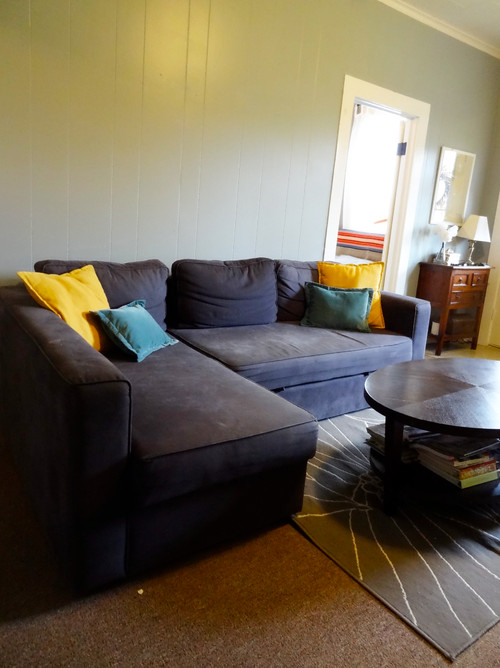
Our living room received a much-needed update with lighter blue-gray walls. This color holds its own in a room that suffers from inadequate natural light. It shifts as the light changes during the day — and is a welcome change from the drab beige and off-white.


So what about you guys? Do you dabble in mixology or do you leave the color blending to the professionals?
I love the smoky blue color in your hallway! Looks great with those maps.
ReplyDeleteI love the color, it's great! Our house has flat paint everywhere that is contractor beige and we are going to do something about it this winter. Definitely checking out your post on Houzz about paint mixing. Thanks for the great post!
ReplyDelete