A budget-friendly DIY & lifestyle blog

Friday, March 21, 2014

DIY // Craft Stick Geometric Pendant Light

March is National Craft Month and to celebrate I'm taking part in Jo-Ann Fabric and Craft Stores' National Craft Month Campaign.  I've been a little unmotivated lately so coming up with a cool craft was not the easiest of tasks.  Luckily, Jo-Ann.com has an amazing spring crafting inspiration website to help get those creative fires burning.


Inspired by the whole geometric trend and my math teacher husband, I decided to finally tackle something I've been coveting for awhile...the good ol' geometric pendant light.


SHARE:

Tuesday, January 14, 2014

DIY // Faceted Baby Mobile

It's amazing how much stuff you can acquire with the sole purpose of keeping a tiny little baby entertained.  We have a rocker, a vibrating bouncy chair, a play mat and about a million little jingly, rattly and straight-up noisy toys.  So it's funny that with all that gear Cal is most content just laying in his crib and staring at his mobile.


And boy does that make me happy.

SHARE:

Wednesday, December 18, 2013

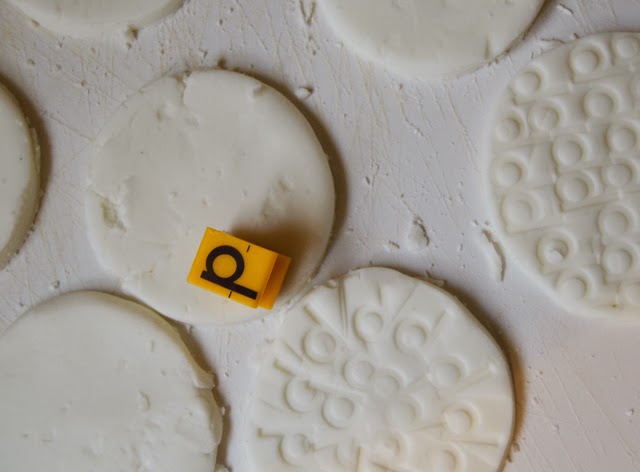
Handmade Holidays // Cornstarch Clay Ornaments

Is it any surprise that I love to throw in a handmade gift for the holidays?  A few years back I made Hot Pepper Jelly and it just wouldn't be Christmas without the Myers girls' annual Homemade Caramel making party.  I'm still making the caramels this year but I'm also adding a handmade ornament using cornstarch clay.


Salt dough tends to be the go-to medium for handmade clay/dough ornaments but a failed attempt last year when I tried making a couple thumbprint ornaments left me pretty unimpressed.  I wasn't a fan of how grainy the ornaments were from the salt granules so I thought I'd give cornstarch clay a try this year.

The recipe for cornstarch clay is slightly more involved than the salt dough but it requires a shorter drying time, is much more smooth and is a nice bright white when finished.

SHARE:

Wednesday, December 11, 2013

DIY Holiday Decor // Christmas Tree String Art

Just like every other holiday, I'm not a big decorator.  There's something about hauling all of the decorations out of their hiding places putting them out for a month and then having to put them all back that just turns me off.  I'm not a total Grinch - I do manage to garner up the motivation to decorate the mantle at Christmas.

This year I kept it pretty simple and traditional with my DIY West Elm Copycat Trees, a vintage window, Pottery Barn velvet stockings, lights and a cedar garland - and a new addition that I whipped up for Jo-Ann Fabrics & Craft Store's Celebrate the Season Campaign.  If this DIY Christmas Tree String Art isn't #fabulouslyfestive I don't know what is.


 To create your own, you'll need:
  • Embroidery Thread (DMC 25 Embroidery Thread #987 from Jo-Ann Fabrics)
  • Scrap Wood or Wood Plaque from Jo-Ann Fabrics
  • Nails/Hammer
  • Tree template
SHARE:

Thursday, November 14, 2013

Thanksgiving Decor // Turkey Tablescapes

We're taking it easy over here for the holidays - something about a new baby and a busy three year old that leaves me little to no time or energy to really get down to crafting/decorating.  I did manage to find a short little break to create this festive thanksgiving tablesetting for Jo-Ann Fabric and Craft Store's Celebrate the Season campaign - a perfect setting for that turkey and all those delicious side dishes.


I kept it simple with a brown craft paper table "cloth" which is inexpensive, customizable and a breeze to clean up.  That homemade cranberry sauce sure is tough to get out of those linen tablecloths.  All I did was cut off two lengths from a roll of craft paper.  To get it to lay down along the sides, just run your finger along the edge of the table creating a sharp crease.  I also folded the corners so they'd drape nicely.


SHARE:

Thursday, October 17, 2013

DIY Monogrammed Tote Bag

I love screenprinted tote bags, but I'm just too lazy to try out the whole DIY screenprinting thing, myself.  It seems so labor intensive and intimidating.  So, instead I created this easy handpainted version for my son Luke that's pretty much just as awesome.


You'll need:

1 // Tote bag
2 // Fabric Paint
3 // Small Paint Brush
4 // Circle template
5 // Pencil

SHARE:

Thursday, October 10, 2013

Spooky Spaces // A Halloween Mantle

I'm not one to go all out for the holidays and decorate every room in the house, but I do like to update the mantle from time to time.  Using a budget-friendly combination of crafty projects and home decor pieces I already own, Halloween is one of my favorite holidays to change things up.  So, when Jo-Ann Fabrics and Craft Stores contacted me to participate in their Celebrate the Season campaign, I jumped at the chance and created a spooky Halloween inspired mantle fit for any sinister character.


All it took to transform my everyday mantle into a spooky space was a quick trip to my local Jo-Ann Fabrics and Craft Store for supplies to create a simple craft and a couple additional Halloween decor items, plus a few more pieces I already had laying around the house.

The Holiday Decorations Spider Web Mantle Scarf, Martha Stewart Happy Halloween Banner, paper-mache witches hat and paper-mache tombstone were each on sale at Jo-Ann's and only ran me a total of $14.26.  Not too shabby!
SHARE:

Monday, September 2, 2013

DIY Luggage Tags

It's summer (yes September is still summer!) and that means travel!  Whether you're a globe-trotter or a weekend-getaway type there's not a more perfect time to be out-and-about than now.  So pack your bags and get out and see the world but don't forget your luggage tag...and I'm not talking about that plain, boring one from the airline counter.


It seems that every good vacation has its moments of chaos and nothing is more stressful than losing your bags.  Luckily, a fresh update on an ordinary travel staple will save that favorite item of yours from being lost forever and look good in the process.  Here's a quick and simple way to make your own stylish luggage tags using stunning fabric and a little sewing - even a beginner can handle.
SHARE:

Monday, August 12, 2013

Kid n' Play // DIY Lego Puzzle Book {Downloadable}

Let's be honest - working on DIY projects with kids around is nearly impossible.  They either want to "help" or they have other plans for how they want you to spend your afternoon.  For those times when I need to get something done busy projects are a life saver and they sure beat sticking an iPhone in my little one's hands.

Legos have been around for decades and are a favorite among both kids and parents.  A Lego Puzzle Book, which I first spied over at KidsActivitiesBlog, is a perfect project to engage kids in an activity that they highly enjoy which means plenty of uninterrupted project time for Mama, too.  It may require a little help at first but once they get the hang of it it's a perfect independent play project that develops important math and problem solving skills.


A few months back I laid out a few of Luke's Lego creations on white copy paper and snapped a few photos.  I finally got around to creating the puzzle book which was as simple as printing off the photos onto cardstock and stapling the book together.
SHARE:

Thursday, January 31, 2013

DIY CRAFTS: 14 Crafts & Activities for Valentine's Day

Last year I was a bit more motivated than I am this year and created one project a day for 14 days and I called it...wait for it....


Original, right?  Well here's a recap of all the projects from last year.


SHARE:

Tuesday, December 25, 2012

Say Merry Christmas With A DIY Personalized Mug

First off, Merry Christmas!  I hope you all are enjoying some quality time with your families.  After all that has happened it's these little things, time spent with family and friends, that seem so important.  So cuddle up, stay up a little later and cherish every moment.

This quick and simple DIY gift is perfect for the coffee lover in your family or any last minute gift giving.


I know I'm not the first one to venture into sharpie drawing craziness (my neighbor made some adorable stick figure mugs for her Mom), but I thought I'd share this easy DIY gift idea, anyhoo.
SHARE:

Friday, November 30, 2012

Pumpkin A'Plenty - 6 Ways to Put That Pumpkin Decor To Use

Now that we're fully into Christmas decorating season, what are you going to do with the leftover pumpkins that survived the fall?  Luckily, I have six ways to keep them from rotting on your front porch.

1.  Roast The Seeds

Who doesn't love baked pumpkin seeds?  Cut the pumpkin in half and separate the seeds from the membrane.  Rinse the seeds and allow them to dry on a paper towel.  Spray a baking sheet with oil, spread out seeds evenly, sprinkle with salt and bake for 10-20 minutes at 350 degrees.  Store seeds in an airtight container.  Regular ol' pumpkin seeds a little too boring?  Try these tasty takes on the classic - cinnamon & sugar, ginger-orange zest, spicy and cheesy.

{VIA}

SHARE:

Thursday, November 8, 2012

DIY Halloween Costumes

What?  It's been over a week since Halloween?  Rather than get caught up in the details let's just take a look at our rad DIY Halloween costumes this year. 

The hubs and I stepped out on the town the Saturday before Halloween for some much needed grown up fun.  We threw these little numbers together last minute using things we had at home, plus some makeup and hair assistance from the neighbors. 

Say hello to Frankenstein and Frankenstein's Bride.


Not too shabby for pulling it out a couple hours before the party.  And guess what?  That's my wedding dress!  Frankenstein's bolts - those are painted marshmallows.  They did a pretty damn good job of sticking too.  My hair - that's the end result of some crazy teasing and a disgusting mixture of egg whites and elmer's glue.  I woke up the next morning still rocking the hair style.  It.Didn't.Move.  Luckily it came out pretty easily in the shower with the ol' smear on a bunch of conditioner, brush through, rinse and wash method.
SHARE:

Thursday, October 4, 2012

DIY // Date Night Jar & A Little Kismet

Four years ago today I was blissfully being pampered - getting ready to walk down the aisle.  I was nervous and excited and ready to party down as Mrs. Padgett!  It's amazing how fast the years go by, how much changes in such a short amount of time and how we haven't suffered a single itch.  I'm still feeling pretty lucky.

We used to celebrate our anniversary by returning to the place where we spent our honeymoon, Whistler B.C. - where we'd gorge ourselves on the best fried calamari we've ever eaten at Ric's Grill, get all wrinkly in the outdoor hot tub and sleep in late in the amazingly comfy beds at the Adara Hotel and drink far too much wine.  Keeping within our budget, we won't be taking refuge with the Canucks this year and will instead be taking a few days off much closer to home.  But just because our spending has been dialed back doesn't mean the sentiment had to be.  And nothing says I love you more than homemade gifts, right?


I've been meaning to make us one of those date night jars for SO LONG.  It's a popular idea on pinterest and one that would take little skill to make.
SHARE:

Tuesday, September 25, 2012

11 Fascinating Faceted DIY Projects

Hey there!

I'm on a faceted kick.  Maybe it's because school is back in session and my husband is up to his elbows in geometry lesson plans or maybe it's just the simple fact that I like the surprising use of texture and shape. Either way, I've got it bad.

What's faceted you ask?  Simply put, it means having many non-parallel surfaces.

I first stumbled upon this faceted pendant lamp and have been in the process of making my own but that process has been stretched out weeks upon weeks.  My choice between making a million little cootie catchers or just lazily sprawling out on the sofa to watch some garbage tv (my favorite kind) has been a bit one sided as of late.


Not only have I been gaga over this lamp, but I've been coveting some origami art in my husband's classroom.  It's been hard not to just slip a few of the best pieces into my bag when we're sharing lunch.  I suppose I could just make my own, but first I'm thinking about busting out all of these beautifully crafted projects.
SHARE:

Friday, September 14, 2012

Vintage Sofa Reveal

I love myself a good ol' trash to treasure transformation and while I wouldn't necessarily consider the sofa trash before the update it was a jaw dropping transformation, nonetheless.  Our last "Ask Michelle" Q&A had us considering reupholstering our old hand me down furniture as opposed to dropping it off at the local thrift store.  Michelle shared her ideas for updating her own family heirloom and I'm stoked to be able to show you the results of her (and her team's) hard work!


Michelle's grandparent's sofa, an item overflowing with sentimental value and lacking any actual monetary value, had made its way through the family after her grandparents' passings and she was the next in line to take ownership.  The sofa was originally purchased in 1971 and had gotten an update with a striped fabric in the 80s. Rather than keeping it in its retro state and subjugated to the basement, Michelle knew that this sofa, with its clean lines and a few updates, could be a key piece of furniture in her own home.
SHARE:

Wednesday, July 11, 2012

Astoria Craft Party August 24th 4-8pm

We are well underway with plans for the first ever Astoria Craft Party on August 24th from 4-8 pm at the Fort George Lovell Building.


We have an amazing lineup of activities:
  • Blacksmith Crafts
  • "Broken Glass" frames 
  • Glass Ornament Blowing
  • License Plate Art
  • Nautical Fancy Work
  • Paper crafts made from vintage maps and charts
  • Photo Walk
  • Pinback buttons
  • Rag Dolls
  • Salvaged Door Knob Hanger
  • Scrabble tile art
  • Spindle Bird Feeder
  • Stenciled Subway Style Pallet Art
  • Stenciled Scandinavian Flag Tote Bags
  • Vintage Cabinet Door Chalkboards
  • Vintage Drawer & Window Planters
For more details, check out AstoriaCraftParty.blogspot.com.  Hope to see you all there!


SHARE:

Monday, July 9, 2012

Pinterest Challenge Summer Edition: Good (re)vs. Evil Kid's Cape

Guess what time it is????  YEP!  It's...


Jumping up and down?  Me too!


The lovely ladies, Katie from Bower Power and Sherry from YoungHouseLove along with the equally lovely Kate - better known as Centsational Girl and Michelle from the blog Ten June are the hosts for this summer edition.
SHARE:

Thursday, June 28, 2012

Handmade Gift Exchange: Hand-Painted Tea Towels

I was so excited to take part in the Summer edition of the Handmade Gift Exchange. Twice a year, Linda from Craftaholics Anonymous, hosts a Handmade Gift Exchange where you give and get a handmade gift! So, what's my fascination?  I've always had a fondness for pen pals.  In high school I had a pen pal from England who I wrote for years and when I first met my husband, and still to this day, we write each other while he's fishing in Alaska.  There's something so exciting about getting something (other than bills) in the mail and something even more exciting about gifts in the mail.


My giftee was Rhonda from the amazing Mrs. Greene who hails from Michigan.  I totally failed at being super creative (especially as I see all the other gifts that were made), but I hope that I was at least a little creative in creating two Michigan inspired hand-painted tea towels.


SHARE:

Wednesday, June 13, 2012

DIY Kid's Felt Board

I'm always trying to think of activities to keep my little man entertained.  He's at that age where he's starting to get into pretend play.  Something I remember from growing up was a felt board.  I thought this was the perfect way he could express his creativity and it could also be used for learning activities.

Not only is it pretty simple to make a felt board, but it is also pretty inexpensive too.


Supplies:
SHARE:
© Revamp Homegoods. All rights reserved.
Blogger templates by pipdig
09 10 Code line 7 9 is for loading jQuery library. Remove this line if you’ve already loaded it somewhere else in your blog. Hint: If your blog has an image slider, carousel or something with fading effect running, chances are it is powered by jQuery. If this widget doesn’t work, the first thing you want to do is comment out or remove this line. To use your own button, replace the URL in line 3 with the direct link URL to the image. Make sure to keep the quotes. To reposition the button, replace