The holiday season is full of traditions and ours is no different. Each year we spend time with family watching National Lampoon's Christmas Vacation, playing card games, listening to holiday music and eating until our bellies burst. We also are sure to send out a photo card to wish everyone a good season and a happy new year.
Shutterfly has been our go-to for our photo cards. Their paper is nice and thick and their printing is high-quality. We usually find a coupon for our stack of cards but the price is still a bit more than the generic holiday cards you can find in-store. Always the budget-minded shopper, this year I stumbled upon an amazing groupon for a new company so I thought I'd give it a try.
Zazzle is an online marketplace where you can create, buy and sell custom-printed items. Want a custom protective case for your smartphone? Done. Want to print that hilarious cat-meme you created on a coffee mug? No problem. Want to send out holiday cards with photos of your adorable family. Perfect timing!
Customizing our cards was super simple with their online customization tools - just upload the photos, edit the text and colors and complete the order. We received our cards about 3 days after we ordered through Zazzle. We received 75 double-sided printed cards on heavy cardstock for less than $40. Not too bad.
Plus, right now Zazzle is having a holiday sale so stock up on those holiday cards and tell those you love howdy! (P.S. Use the code personalcheer at checkout for 50% off your cards!)
Happy Holidays!
Tuesday, November 25, 2014
Thursday, July 3, 2014
DIY // How To Repair Your Walls with 3M DIY & A Bedroom Makeover
Our house was previously a rental property that experienced some abuse from tenants. The owners had fixed it up and rented it out; only to have to replace the carpet and paint the walls after the tenants destroyed the place. I totally get the frustration of having to fix what you've just repaired but using a paint sprayer while frustrated really does no good to anyone. Drips are not attractive or easy
to remove once they've dried. The same rings true for wallpaper that's been painted over. Unfortunately, we inherited both as well as a million nail holes all over the room. What on earth were they hanging? I will always wonder…
After living here for 2 1/2 years and staring at the eyesores, I finally gained the motivation to tackle it all. Actually it didn't quite work out that way. My curious little 4 year old noticed a piece of the wallpaper peeling so he pulled at it....and kept pulling at pieces. He took most of it off and I finished the rest for him with my trusty knife from the kitchen. Hey, it was quick to grab and I was impatient.
Labels:
3MDIY,
3MPartner,
bedroom,
BEFORE AND AFTER,
BUDGET FRIENDLY,
paint
Friday, March 21, 2014
DIY // Craft Stick Geometric Pendant Light
March is National Craft Month and to celebrate I'm taking part in Jo-Ann Fabric and Craft Stores' National Craft Month Campaign. I've been a little unmotivated lately so coming up with a cool craft was not the easiest of tasks. Luckily, Jo-Ann.com has an amazing spring crafting inspiration website to help get those creative fires burning.
Inspired by the whole geometric trend and my math teacher husband, I decided to finally tackle something I've been coveting for awhile...the good ol' geometric pendant light.
Friday, March 14, 2014
DIY // The Kitchen/Mudroom Renovation - What We Love & What We Don't
It's been a good 6 months since we finished our Kitchen/Mudroom renovation, so I thought I'd share a breakdown of what we have loved and what we kind of don't.

Let's start with the positives and a good ol' before and after as a refresher of how much this space has changed since we first moved in back in December 2011.

Let's start with the positives and a good ol' before and after as a refresher of how much this space has changed since we first moved in back in December 2011.
Labels:
BEFORE AND AFTER,
BUDGET FRIENDLY,
DIY HOME UPDATES,
kitchen,
mudroom
Thursday, February 6, 2014
This Cold House // Replacing Our Baseboards With Envi Convection Heaters
Old houses - what they offer in charm, they lack in warmth. Or at least ours does. This little 1900 cabin is a drafty bugger. It just might have something to do with it's lack of insulation on the walls and floors. So when it's cold it is darn cold.
Last spring, when we opened up the kitchen nook to the mudroom, we pulled out our baseboard heater that was mounted along that wall - and the three others that were in the living room, kids bedroom and our bedroom. Our choice to pull them out weighed on the fact that they take up so much wall space. With the living room baseboard removed we could move our couch to be placed along that wall and we had already run into issues of Luke sticking toys into them - something sure to repeat with Cal. So the decision was pretty easy - potential house fire and increased usable space meant they had to go.
Rather than live 1900s style and just rely on our wood stove (that isn't even functioning at the moment) we had to find replacements. Size, safety and high-efficiency were all things we hoped to find in our new heaters. I had seen the Envi Wall Mounted Convection Heaters advertised in the back of my home magazines and was intrigued. After reading a few reviews, like this one, we decided to pull the trigger and ordered 4. The price wasn't too bad about $120 each (check those home magazines - sometimes there are 15% off coupons in the advertisements section.)
Last spring, when we opened up the kitchen nook to the mudroom, we pulled out our baseboard heater that was mounted along that wall - and the three others that were in the living room, kids bedroom and our bedroom. Our choice to pull them out weighed on the fact that they take up so much wall space. With the living room baseboard removed we could move our couch to be placed along that wall and we had already run into issues of Luke sticking toys into them - something sure to repeat with Cal. So the decision was pretty easy - potential house fire and increased usable space meant they had to go.
Rather than live 1900s style and just rely on our wood stove (that isn't even functioning at the moment) we had to find replacements. Size, safety and high-efficiency were all things we hoped to find in our new heaters. I had seen the Envi Wall Mounted Convection Heaters advertised in the back of my home magazines and was intrigued. After reading a few reviews, like this one, we decided to pull the trigger and ordered 4. The price wasn't too bad about $120 each (check those home magazines - sometimes there are 15% off coupons in the advertisements section.)
Wednesday, January 29, 2014
DIY // How To Steal Art For Your Home (And Not Get Caught)
No matter your budget there are ways to decorate your home to show off your personal style. It's obvious I'm a thrifting addict and I find tons of decor items and art at my local thrift stores. I'm also not against stealing, repurposing or even making art from scratch. Yes, I said steal but not in the "dress in all black slink into a museum and caper that Monet you've been coveting" way. Things like magazines, cards or finding free illustrations online are all fair game. Just take the art from our DIY industrial shelves for example.
Internet // The framed whale illustration I found online, printed on cardstock and stuck in a crate and barrel frame is one of my favorites. The camera print on the opposite shelf (scroll down for photo) which is another favorite is available online as a free download from Design Editor (as well as a photo of a vintage brownie camera.) Both can be printed up to a 24x36 inch print.
Tuesday, January 7, 2014
DIY // Wooden Alphabet Wall Art
Did you catch the boys' shared room tour a couple weeks ago? You might have caught a glimpse of my latest DIY project. I've long been a fan of letter decor in children's rooms. I've even pinned a few inspirations here, here and here. So it was only a matter of time before I tackled a project of my own.
I picked up the white 6" MDF letters, a staple gun and some velcro from Jo-Ann Fabrics and Craft Store. Each of the letters were on sale for half price and I used a coupon for the rest - grand total: around $60.
Tuesday, December 31, 2013
DIY // Budget-Friendly Industrial Wall Shelving
There's no better way to wrap up a whole year than with one final DIY project. When we first walked through our house there were a few changes that we knew we'd be making; opening up the mudroom to the kitchen and adding bookshelves around the fireplace. Two years later and we can proudly report that we've finally knocked both off our to-do list.
This update was budget-friendly and simple to build, plus it totally transformed our living room. I picked up the supplies from Home Depot for less than $130 and broke out my trusty 3MDIY supplies to get started.
Labels:
3MDIY,
BUDGET FRIENDLY,
DIY DECOR,
DIY HOME UPDATES
Friday, December 27, 2013
Baby & Toddler // Kids' Shared Room Reveal
Luke and Callaghan's room is well on its way to being a finished space. The painted striped walls and painted chalkboard wall are still hanging tough but we made a few changes to make it more suitable for two kids. The addition of the DIY loft bed allowed us to open up some flooring space. If you remember from our children's shared bedroom inspiration post, we initially wanted to place the crib underneath but we just weren't comfortable with how tall the loft bed would have had to be. So we scrapped that idea and decided a play & work area underneath would be better all around.
Labels:
BEFORE AND AFTER,
BUDGET FRIENDLY,
DIY,
DIY DECOR,
kids
Monday, December 23, 2013
DIY // Loft Bed Book Storage
We're a family of book lovers. Both sides of our family are readers which is one of the reasons why we fell in love - that and crosswords...and beer. We have boxes and boxes of paperbacks and hardbacks upstairs that are just waiting to come out of hiding once we build a couple of built-in shelves for the living room. It's not surprising, either, that our boys' room is overflowing with storybooks.
Reading is our one and only bedtime ritual that has stuck and now that Luke is getting older he's joining in on the action. After we read to him he usually insists on reading to us. He's got The Spooky Old Tree and SuperMan down pat and improvises pretty dang well on any other stories. After storytime is over he usually crawls into bed and falls asleep "reading" to himself.
To keep his favorite books close I added a little bookshelf to the inside of his loft bed using a Bekvam spice rack from Ikea. This spice rack is SUPER inexpensive (only $3) and is the same natural wood tone as the loft bed.
Reading is our one and only bedtime ritual that has stuck and now that Luke is getting older he's joining in on the action. After we read to him he usually insists on reading to us. He's got The Spooky Old Tree and SuperMan down pat and improvises pretty dang well on any other stories. After storytime is over he usually crawls into bed and falls asleep "reading" to himself.
To keep his favorite books close I added a little bookshelf to the inside of his loft bed using a Bekvam spice rack from Ikea. This spice rack is SUPER inexpensive (only $3) and is the same natural wood tone as the loft bed.
Wednesday, December 18, 2013
Handmade Holidays // Cornstarch Clay Ornaments
Is it any surprise that I love to throw in a handmade gift for the holidays? A few years back I made Hot Pepper Jelly and it just wouldn't be Christmas without the Myers girls' annual Homemade Caramel making party. I'm still making the caramels this year but I'm also adding a handmade ornament using cornstarch clay.
Salt dough tends to be the go-to medium for handmade clay/dough ornaments but a failed attempt last year when I tried making a couple thumbprint ornaments left me pretty unimpressed. I wasn't a fan of how grainy the ornaments were from the salt granules so I thought I'd give cornstarch clay a try this year.
The recipe for cornstarch clay is slightly more involved than the salt dough but it requires a shorter drying time, is much more smooth and is a nice bright white when finished.
Salt dough tends to be the go-to medium for handmade clay/dough ornaments but a failed attempt last year when I tried making a couple thumbprint ornaments left me pretty unimpressed. I wasn't a fan of how grainy the ornaments were from the salt granules so I thought I'd give cornstarch clay a try this year.
The recipe for cornstarch clay is slightly more involved than the salt dough but it requires a shorter drying time, is much more smooth and is a nice bright white when finished.
Tuesday, December 17, 2013
Small Space Solutions // A Makeshift Changing Table
Furniture that serves double-duty is key to getting the most out of a small space which is why there was no way I was going to purchase a changing table. Most of the time we're changing Cal in the living room but there are times where a designated place for changing in the bedroom comes in pretty handy.
The old blue dresser was replaced with this 7-drawer dresser which not only holds both boys' clothes but also is the perfect platform for a makeshift changing table.
Two inexpensive two-compartment wooden crates from Jo-Ann Fabrics and Craft Store keep all the necessities right at hand and the changing pad (with chevron cover) keep baby comfy and safe during diaper changes. I purchased my pad new because I couldn't find a used one, but for those of you that don't live in the boonies finding a used changing pad should be no problem. (They're gently used and have a plastic cover so you shouldn't have to worry about this used item for baby.)
The old blue dresser was replaced with this 7-drawer dresser which not only holds both boys' clothes but also is the perfect platform for a makeshift changing table.
Two inexpensive two-compartment wooden crates from Jo-Ann Fabrics and Craft Store keep all the necessities right at hand and the changing pad (with chevron cover) keep baby comfy and safe during diaper changes. I purchased my pad new because I couldn't find a used one, but for those of you that don't live in the boonies finding a used changing pad should be no problem. (They're gently used and have a plastic cover so you shouldn't have to worry about this used item for baby.)
Thursday, December 12, 2013
Apartment Therapy's Renovation Diary // Mudroom Renovation Lessons Learned
Phew! Well that about sums it up. Our Apartment Therapy Renovation Diary experience has come to a close but before we say so long we're sharing our lessons learned from our DIY mudroom renovation.
Hop on over to Apartment Therapy and check it out - or take a look back at the whole process.
Labels:
apttherapy,
BUDGET FRIENDLY,
DIY HOME UPDATES
Monday, December 9, 2013
Kids' Shared Room // DIY Loft Bed
Things have been going pretty great since we brought home our newest little boy (knock on wood). Big brother has taken to sharing his Mama & Daddy pretty dang well but sharing parents isn't the only thing Luke has had to get used to. Being tight on space, a shared kids'
room was a given. So Luke's toddler bed got the boot and was replaced by a new DIY loft bed
and the crib.
We used plans from Ana-White.com and adjusted them slightly to better fit our room. Rather than an angled set of stairs leading to the platform, we replaced it with a short vertical ladder. We also increased the height of the bed to allow for another bunk in the lower section for when Callaghan outgrows his crib. Plus, we added handles to the bed which made it easier for Luke to get up and down.
Thursday, December 5, 2013
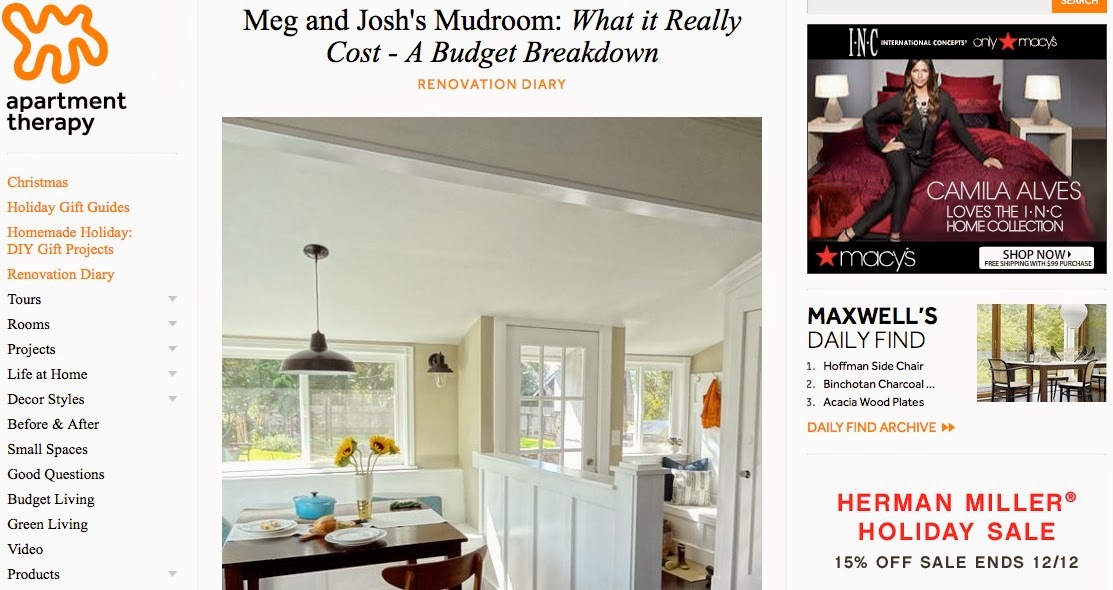
Apartment Therapy's Renovation Diary // Mudroom Renovation Budget Breakdown
Our Renovation Diary project is wrapping up - only one more post - and it sure does make me sad. I've loved sharing our renovation with you via Apartment Therapy...perhaps they'd be interested in our attic renovation?? A girl can dream...
Wednesday, November 27, 2013
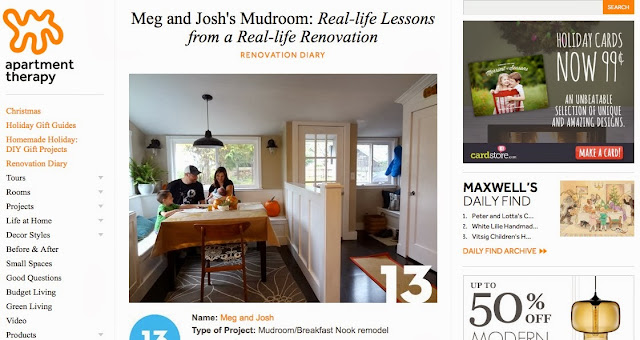
Apartment Therapy's Renovation Diary // The Mudroom Reveal
It's here! The big reveal day and I am just so excited to share it all with you. So, hop on over to our latest installment of our Renovation Diary on Apartment Therapy and check out the finished project for yourself, but watch out - you might have to pick your jaw off the floor!
To really feel the full affects of this DIY renovation, check out where we started - dark wood paneled walls, closed off spaces and no real style to speak of. To say that I'm happy with the change is a definite understatement!
Tuesday, November 19, 2013
Apartment Therapy's Renovation Diary // It's A Wrap
We made it to the finish line and are sharing all the details at Apartment Therapy's Renovation Diary! The mudroom renovation project is a wrap - check it out.
Be sure to check back next week to see the big ol' reveal post! I can't wait to share it with all of you.
Tuesday, November 12, 2013
Apartment Therapy's Renovation Diary // Moving the Finish Line
Our initial plan in the whole mudroom renovation project was to finish everything by the time Josh packed up and flew to Alaska to bring home the bacon halibut but we didn't quite make it. Check out why our progress was delayed in our latest installment in Apartment Therapy's Renovation Diary.
Only one more progress post left and then we'll finally be able to share the finished space. I can't wait!
Labels:
apttherapy,
BUDGET FRIENDLY,
DIY HOME UPDATES
Monday, November 11, 2013
Budget Friendly DIY Kitchen Renovation // The Big Reveal
If you're keeping up with our Renovation Diary feature on Apartment Therapy - you know the posts are pretty far behind our actual progress. Real far behind, actually, because we're completely finished (shh...don't tell those AT readers!) I mean...we're not crazy enough to start a remodel project when our baby is due....or are we?
While I can't show you photos of the new mudroom and kitchen nook space since we're just getting started on that project (wink, wink...nudge, nudge) I can show you photos of our kitchen which includes new flooring, crown molding and our new Moen Woodmere faucet. And if you remember WAY back in early 2012 we tackled the bulk of the work in this room which included:
And without further ado...
Let's just take a quick look back at what the kitchen looked like when we moved in...wallpapered walls and soffit, oak cabinets, maple-ish laminated floors, white appliances, vinyl backsplash and boob lights galore. Not the worst kitchen I've ever seen but I knew it could be better. At the very least we could fill that huge gap where the bottom cabinets end on the far right.
While I can't show you photos of the new mudroom and kitchen nook space since we're just getting started on that project (wink, wink...nudge, nudge) I can show you photos of our kitchen which includes new flooring, crown molding and our new Moen Woodmere faucet. And if you remember WAY back in early 2012 we tackled the bulk of the work in this room which included:
- Removing the header, taking the walls down to the studs and installing new drywall
- Mudding & sanding drywall
- Painting the cabinets white
- Priming/Painting the drywall
- Installing/Raising the cabinets
- Painting wallpaper
- Adding open shelving
- Adding wall storage
- Updating the kitchen lighting
- Adding open shelving above the refrigerator
And without further ado...
Let's just take a quick look back at what the kitchen looked like when we moved in...wallpapered walls and soffit, oak cabinets, maple-ish laminated floors, white appliances, vinyl backsplash and boob lights galore. Not the worst kitchen I've ever seen but I knew it could be better. At the very least we could fill that huge gap where the bottom cabinets end on the far right.
Labels:
BEFORE AND AFTER,
BUDGET FRIENDLY,
DIY HOME UPDATES
Tuesday, November 5, 2013
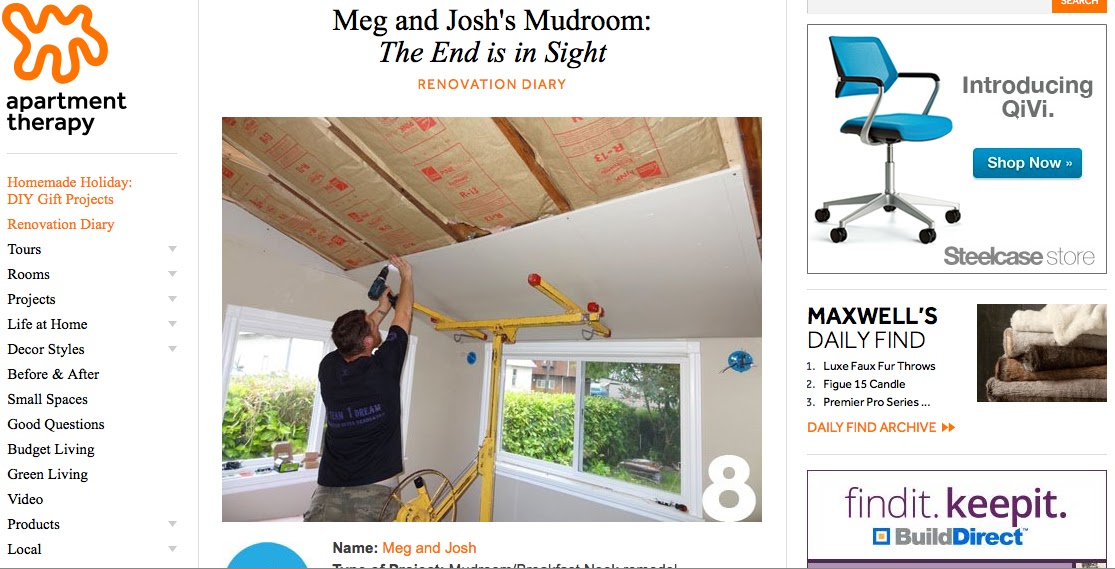
Apartment Therapy's Renovation Diary // The End Is In Sight
We're well on our way to a finished space. Check out our latest installment in Apartment Therapy's Renovation Diary where we're throwing down flooring and throwing up drywall.
I love how drywall transforms a room from scary, bare bones to something you can live in.
Subscribe to:
Posts (Atom)
©
Revamp Homegoods. All rights reserved.