There's no better way to wrap up a whole year than with one final DIY project. When we first walked through our house there were a few changes that we knew we'd be making; opening up the mudroom to the kitchen and adding bookshelves around the fireplace. Two years later and we can proudly report that we've finally knocked both off our to-do list.
This update was budget-friendly and simple to build, plus it totally transformed our living room. I picked up the supplies from Home Depot for less than $130 and broke out my trusty 3MDIY supplies to get started.
Tuesday, December 31, 2013
Friday, December 27, 2013
Baby & Toddler // Kids' Shared Room Reveal
Luke and Callaghan's room is well on its way to being a finished space. The painted striped walls and painted chalkboard wall are still hanging tough but we made a few changes to make it more suitable for two kids. The addition of the DIY loft bed allowed us to open up some flooring space. If you remember from our children's shared bedroom inspiration post, we initially wanted to place the crib underneath but we just weren't comfortable with how tall the loft bed would have had to be. So we scrapped that idea and decided a play & work area underneath would be better all around.
Labels:
BEFORE AND AFTER,
BUDGET FRIENDLY,
DIY,
DIY DECOR,
kids
Monday, December 23, 2013
DIY // Loft Bed Book Storage
We're a family of book lovers. Both sides of our family are readers which is one of the reasons why we fell in love - that and crosswords...and beer. We have boxes and boxes of paperbacks and hardbacks upstairs that are just waiting to come out of hiding once we build a couple of built-in shelves for the living room. It's not surprising, either, that our boys' room is overflowing with storybooks.
Reading is our one and only bedtime ritual that has stuck and now that Luke is getting older he's joining in on the action. After we read to him he usually insists on reading to us. He's got The Spooky Old Tree and SuperMan down pat and improvises pretty dang well on any other stories. After storytime is over he usually crawls into bed and falls asleep "reading" to himself.
To keep his favorite books close I added a little bookshelf to the inside of his loft bed using a Bekvam spice rack from Ikea. This spice rack is SUPER inexpensive (only $3) and is the same natural wood tone as the loft bed.
Wednesday, December 18, 2013
Handmade Holidays // Cornstarch Clay Ornaments
Is it any surprise that I love to throw in a handmade gift for the holidays? A few years back I made Hot Pepper Jelly and it just wouldn't be Christmas without the Myers girls' annual Homemade Caramel making party. I'm still making the caramels this year but I'm also adding a handmade ornament using cornstarch clay.
Salt dough tends to be the go-to medium for handmade clay/dough ornaments but a failed attempt last year when I tried making a couple thumbprint ornaments left me pretty unimpressed. I wasn't a fan of how grainy the ornaments were from the salt granules so I thought I'd give cornstarch clay a try this year.
The recipe for cornstarch clay is slightly more involved than the salt dough but it requires a shorter drying time, is much more smooth and is a nice bright white when finished.
Tuesday, December 17, 2013
Small Space Solutions // A Makeshift Changing Table
Furniture that serves double-duty is key to getting the most out of a small space which is why there was no way I was going to purchase a changing table. Most of the time we're changing Cal in the living room but there are times where a designated place for changing in the bedroom comes in pretty handy.
The old blue dresser was replaced with this 7-drawer dresser which not only holds both boys' clothes but also is the perfect platform for a makeshift changing table.
Two inexpensive two-compartment wooden crates from Jo-Ann Fabrics and Craft Store keep all the necessities right at hand and the changing pad (with chevron cover) keep baby comfy and safe during diaper changes. I purchased my pad new because I couldn't find a used one, but for those of you that don't live in the boonies finding a used changing pad should be no problem. (They're gently used and have a plastic cover so you shouldn't have to worry about this used item for baby.)
Thursday, December 12, 2013
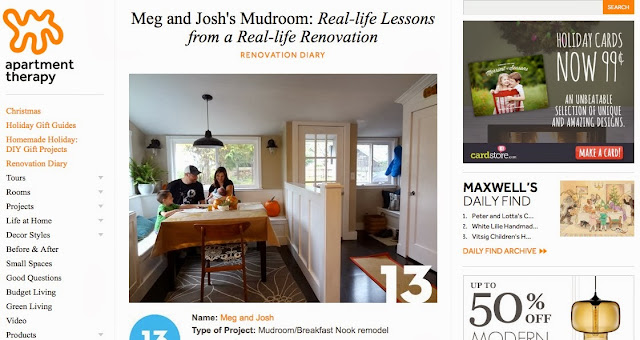
Apartment Therapy's Renovation Diary // Mudroom Renovation Lessons Learned
Phew! Well that about sums it up. Our Apartment Therapy Renovation Diary experience has come to a close but before we say so long we're sharing our lessons learned from our DIY mudroom renovation.
Hop on over to Apartment Therapy and check it out - or take a look back at the whole process.
Hop on over to Apartment Therapy and check it out - or take a look back at the whole process.
Labels:
apttherapy,
BUDGET FRIENDLY,
DIY HOME UPDATES
Wednesday, December 11, 2013
DIY Holiday Decor // Christmas Tree String Art
Just like every other holiday, I'm not a big decorator. There's something about hauling all of the decorations out of their hiding places putting them out for a month and then having to put them all back that just turns me off. I'm not a total Grinch - I do manage to garner up the motivation to decorate the mantle at Christmas.
This year I kept it pretty simple and traditional with my DIY West Elm Copycat Trees, a vintage window, Pottery Barn velvet stockings, lights and a cedar garland - and a new addition that I whipped up for Jo-Ann Fabrics & Craft Store's Celebrate the Season Campaign. If this DIY Christmas Tree String Art isn't #fabulouslyfestive I don't know what is.
To create your own, you'll need:
- Embroidery Thread (DMC 25 Embroidery Thread #987 from Jo-Ann Fabrics)
- Scrap Wood or Wood Plaque from Jo-Ann Fabrics
- Nails/Hammer
- Tree template
Monday, December 9, 2013
Kids' Shared Room // DIY Loft Bed
Things have been going pretty great since we brought home our newest little boy (knock on wood). Big brother has taken to sharing his Mama & Daddy pretty dang well but sharing parents isn't the only thing Luke has had to get used to. Being tight on space, a shared kids'
room was a given. So Luke's toddler bed got the boot and was replaced by a new DIY loft bed
and the crib.
We used plans from Ana-White.com and adjusted them slightly to better fit our room. Rather than an angled set of stairs leading to the platform, we replaced it with a short vertical ladder. We also increased the height of the bed to allow for another bunk in the lower section for when Callaghan outgrows his crib. Plus, we added handles to the bed which made it easier for Luke to get up and down.
We used plans from Ana-White.com and adjusted them slightly to better fit our room. Rather than an angled set of stairs leading to the platform, we replaced it with a short vertical ladder. We also increased the height of the bed to allow for another bunk in the lower section for when Callaghan outgrows his crib. Plus, we added handles to the bed which made it easier for Luke to get up and down.
Thursday, December 5, 2013
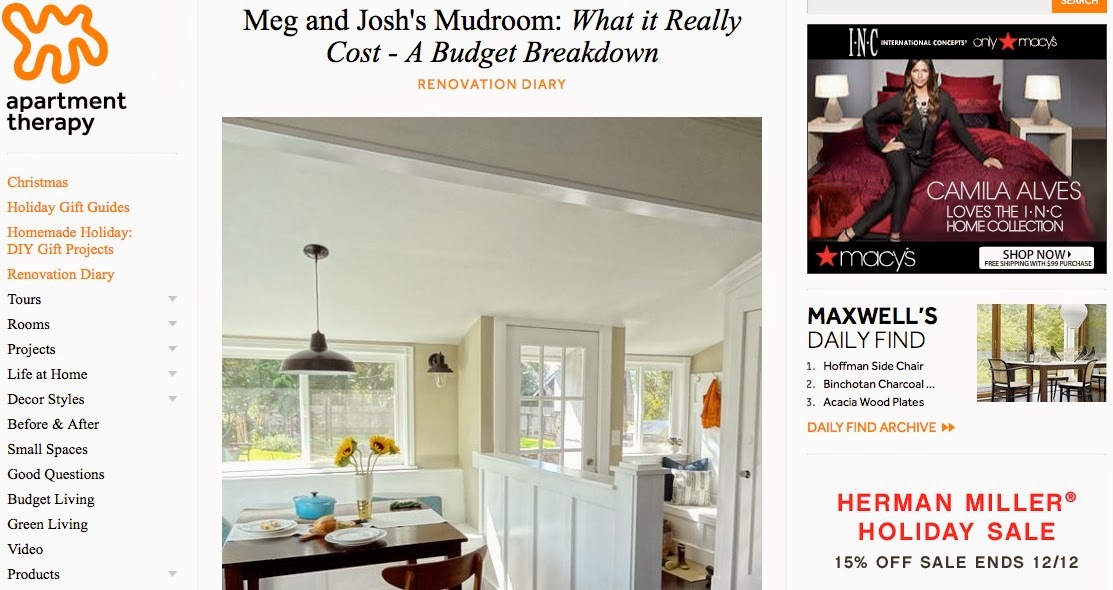
Apartment Therapy's Renovation Diary // Mudroom Renovation Budget Breakdown
Our Renovation Diary project is wrapping up - only one more post - and it sure does make me sad. I've loved sharing our renovation with you via Apartment Therapy...perhaps they'd be interested in our attic renovation?? A girl can dream...
Subscribe to:
Comments (Atom)
©
Revamp Homegoods. All rights reserved.


